Audi Q7: Cover and Cushion, Removing and Installing
Cover and Cushion, Removing and Installing, Second Row Seat Pan Low
Removing
- Remove the guide for the lower child seat anchor. Refer to → Chapter "Lower Child Seat Anchor Guide, Removing and Installing, Second and Third Row".
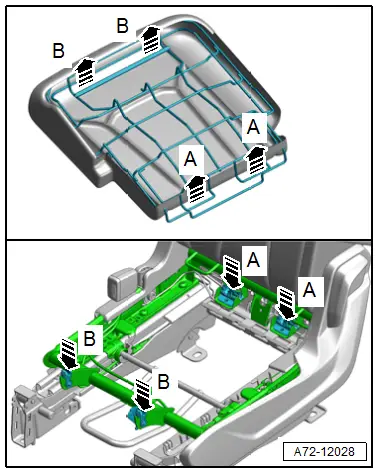
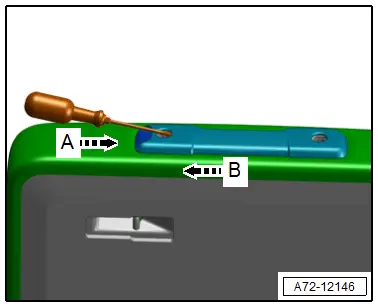
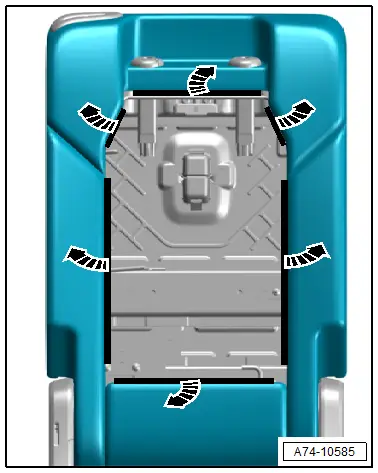
- Press each catch on all 3 seat frames in direction of -arrow A- and pull the cover upward in direction of -arrows B-.
- If equipped, disconnect the connector for seat heating.

Installing
Install in reverse order of removal and note the following:
- First insert the cushion frame in the back in direction of -arrows A- of the mount on the seat frame, then at the front in direction of -arrows B-.
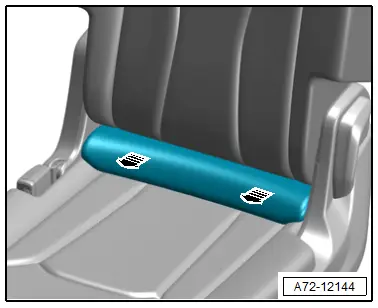
- Press on the cushion firmly at the front and rear.
Installation notes, for example tightening specifications, replacing components. Refer to → Chapter "Overview - Cover and Cushion, Second Row Seat Pan Low".
Cover and Cushion, Removing and Installing, Second Row Seat Pan High
Removing
- Remove the cushion insert in direction of -arrows-.
- Press the locking mechanism in direction of -arrow A- and pull the cushion upward in direction of -arrows B-.
- Disconnect the seat heating electrical connector.
Installing
Install in reverse order of removal and note the following:
- First insert the cushion frame in the back in direction of -arrows A- of the mount on the seat frame, then at the front in direction of -arrows B-.
- Press on the cushion firmly at the front and rear.
Installation notes, for example tightening specifications, replacing components. Refer to → Chapter "Overview - Cover and Cushion, Second Row Seat Pan High".
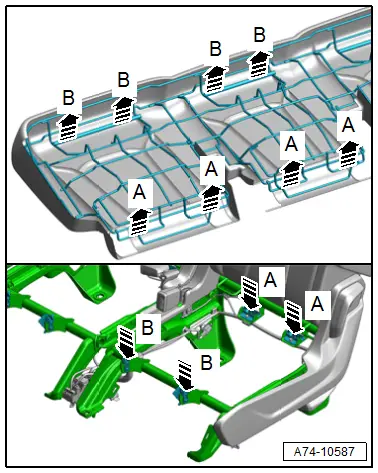
Cover and Cushion, Removing and Installing, Third Row Seat Pan
Removing
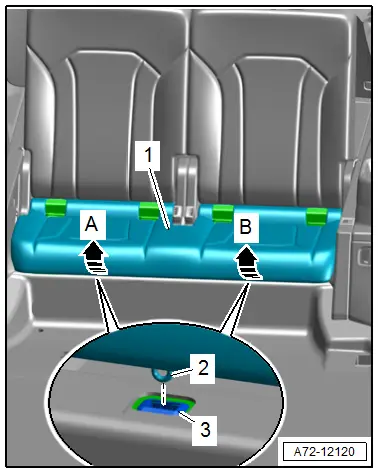
- Remove the guide for the lower child seat anchor. Refer to → Chapter "Lower Child Seat Anchor Guide, Removing and Installing, Second and Third Row".
- Grasp with both hands on one side under the seat cushion frame.
- Pull the seat cushion -1- up forcefully with both hands in direction of -arrow A- so the wire hooks -2- on the seat cushion frame release from the mounting grommet -3-.
- Repeat the procedure on the opposite side -arrow B-.
- Disengage the seat cushion from the seat frame and remove from the vehicle.
Installing
Install in reverse order of removal.
Installation notes, for example tightening specifications, replacing components. Refer to → Chapter "Overview - Cover and Cushion, Third Row Seat Pan".
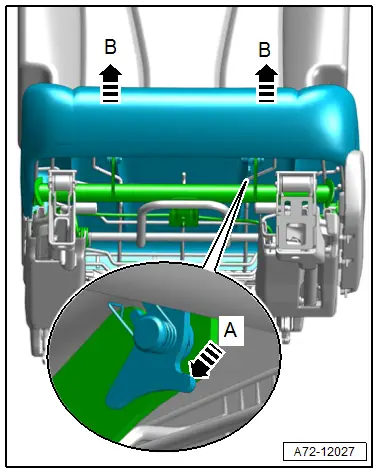
Cover and Cushion, Removing and Installing, Outer Second Row Backrest
Special tools and workshop equipment required
- Pry Lever -80-200-
Removing
- Remove the cushion. Refer to → Chapter "Cover and Cushion, Removing and Installing".
- Remove the headrest. Refer to → Chapter "Headrest, Removing and Installing, Outer Second Row Seat".
- Seat High: remove the rear cover. Refer to → Chapter "Rear Cover, Removing and Installing, Seat High, Second Row".
- Remove the headrest guide trim, as shown, by inserting a screwdriver between the trim and the headrest guide on the button side in direction of -arrow A-
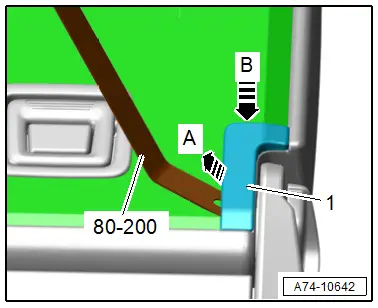
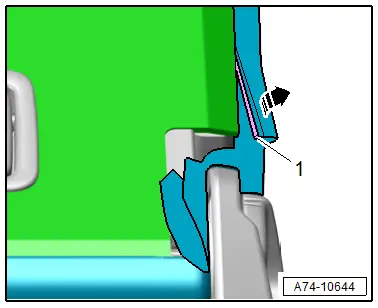
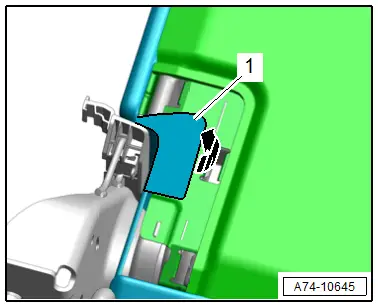
- Unclip the left and right backrest hinge cover -1- at the position shown in the image using the -80-200- in direction of -arrow A- and remove downward in direction of -arrow B-.

- Disengage the left and right cover on the metal hooks.

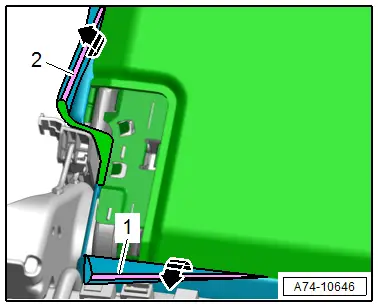
- Disengage the cover molding -1- along the outside of the backrest in direction of -arrow-.
- Remove the rear thorax airbag. Refer to → Chapter "Rear Thorax Airbag with Igniter, Removing and Installing".
- Pull back the cover.
- Disconnect the seat heating wire and free it up.
- Disengage the cushion and cover at the headrest guide and remove them.

Installing
Install in reverse order of removal.
Installation notes, for example tightening specifications, replacing components. Refer to → Chapter "Overview - Cover and Cushion, Second Row Backrest".
Cover and Cushion, Removing and Installing, Center Second Row Backrest
Special tools and workshop equipment required
- Pry Lever -80-200-
- Engine/Transmission Holder - Seat Repair Fixture -VAS6136-
Removing
- Remove the seat. Refer to → Chapter "Bench Seat/Single Seat, Removing and Installing".
- Secure the seat on the -VAS6136-. Refer to → Chapter "Front Seat, Mounting on Fixture for Seat Repair".
Vehicles with a center armrest
- Remove the center armrest. Refer to → Chapter "Center Armrest, Removing and Installing".
- Remove the headrest guide. Refer to → Chapter "Headrest Guide, Removing and Installing, Center Second Row Seat".
Continuation for all seat versions:
- Remove the center rear belt end fitting. Refer to → Chapter "Rear Seat Belt Anchor in Center Seating Position, Removing and Installing".
- Remove the second row seat belt guide in the center. Refer to → Chapter "Rear Seat Belt Guide, Removing and Installing".
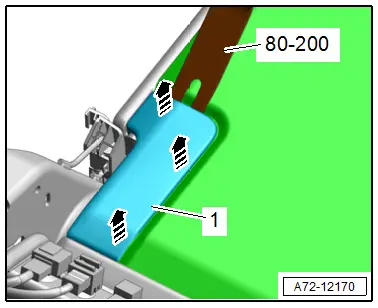
- Unclip the left and right backrest hinge cover -1- at the position shown in the image using the -80-200--arrow A- and remove downward -arrow B-.
- Disengage the left and right cover on the metal hooks.
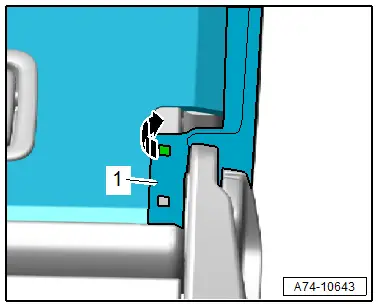
- Disengage the left and right cover molding -1- along the outside of the backrest -arrow-.
- Pull back the cover.
Vehicles with a Center Armrest:
- Disengage the molding all around the armrest cutout from the wire frame -arrows-.
Continuation for All Seat Versions:
- Remove the cushion and cover.
- Disengage the cushion and cover at the headrest guide and remove them.
Installing
Install in reverse order of removal.
Installation instructions: for example tightening specifications, replacing components. Refer to → Chapter "Overview - Cover and Cushion, Second Row Backrest with Center Armrest".
Cover and Cushion, Removing and Installing, Third Row Backrest
Special tools and workshop equipment required
- Pry Lever -80-200-
- Trim Removal Wedge -3409-
Removing
- Remove the seat. Refer to → Chapter "Third Row Seat, Removing and Installing".
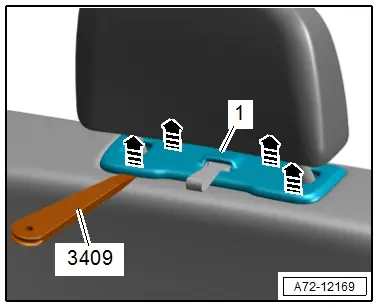
- Unclip the headrest trim -1- using the -3409--arrows-.
- Remove the left and right backrest hinge cover using the -80-200--arrows-.
- Disengage the left and right -1- cover on the metal hook -arrow-.
- Disengage the cover moldings -1 and 2- along the outside of the backrest -arrows-.
- Pull back the cover.
- Remove the headrest. Refer to → Chapter "Headrest, Removing and Installing, Third Row".
- Remove the cushion and cover.
Installing
Install in reverse order of removal.
Installation notes, for example tightening specifications, replacing components. Refer to → Chapter "Overview - Cover and Cushion, Third Row Backrest".

