Audi Q7: Driver and Front Passenger Exit Warning Lamp -W111-/-W112-, Removing and Installing
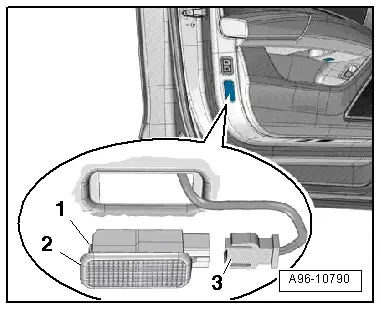
Removing
- Use a flat-head screwdriver to press in the retaining tab -1- and pry out the exit warning lamp -2-.
- Disconnect the connector -3-.

Installing
Install in the reverse order of removal while noting the following:
- If one of the LEDs is faulty, then the entire exit warning lamp must be replaced.
- Insert the exit warning lamp into the opening and engage on the opposite side.
Driver and Front Passenger Door Warning Lamp -W30-/-W36-, Removing and Installing
Removing
- Press the tab -1- with a flat-blade screwdriver and remove the door warning lamp -2-.
- Disconnect the connector -3-.
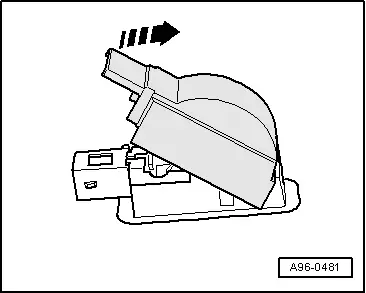
- Carefully pry out the cover over the lamp in direction of -arrow-.

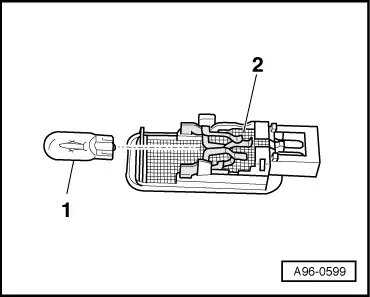
- Remove the bulb -1- from the bulb socket -2- on the back of the door warning lamp.

Installing
Install in the reverse order of removal while noting the following:
- Mount the cover on the door warning lamp.
- Insert the door warning lamp into the opening and engage on the opposite side.
Rear Interior Door Handle Illumination Lamp, Removing and Installing
Removing
- Remove the rear door trim panel. Refer to → Body Interior; Rep. Gr.70; Rear Door Trim Panels; Rear Door Trim Panel, Removing and Installing.
- Turn the bulb socket -2- to the left and remove it from the lighting strip -3-.
- Disconnect the connector -1-.
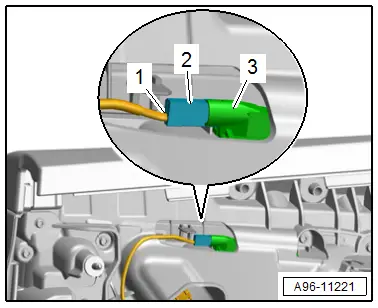
Installing
Install in reverse order of removal.
Rear Entry Lamps, Removing and Installing
Removing
- Use a flat-head screwdriver to press in the retaining tab -1- and pry out the entry lamp -2-.
- Disconnect the connector -3-.
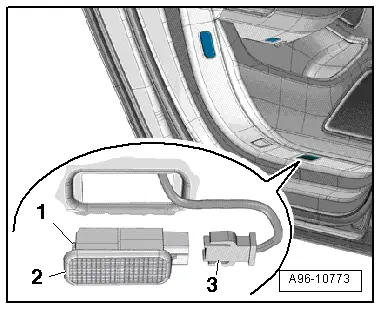
Installing
Install in the reverse order of removal while noting the following:
- The entire entry lamp must be replaced if an LED is faulty.
- Insert the entry lamp into the opening and engage on the opposite side.
Rear Door Warning Lamps, Removing and Installing
Removing
- Press the tab -1- with a flat-blade screwdriver and remove the door warning lamp -2-.
- Disconnect the connector -3-.
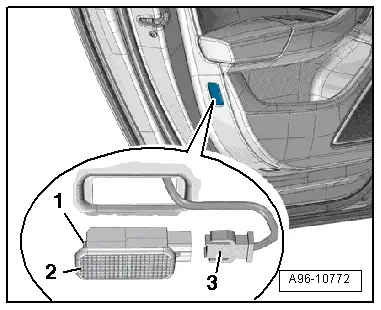
- If equipped, carefully pry out the cover over the lamp in direction of -arrow-.
- Remove the bulb -1- from the bulb socket -2- on the back of the door warning lamp.
Installing
Install in the reverse order of removal while noting the following:
- Mount the cover on the door warning lamp.
- Insert the door warning lamp into the opening and engage on the opposite side.

