Audi Q7: Front Lid, Removing and Installing
- To complete the procedure, a second technician is required to be at the following position.
 NOTICE
Risk of damaging the hood by opening when the pedestrian protection is triggered
- Only open the hood after the triggered pedestrian protection has been reset.
- Removed pedestrian protection: hinge is reset. Refer to → Chapter "Hinge, Resetting"
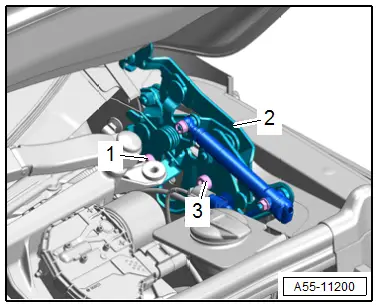
- Remove the washer nozzles. Refer to → Electrical Equipment; Rep. Gr.92; Windshield Washer System; Washer Nozzles, Removing and Installing.
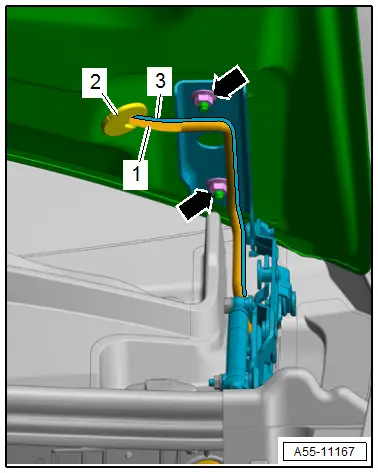
- Remove the grommet -2-.
- Guide out and free up the wiring harness -1- and washer fluid hose -3- from the hood.
- Mark the installation position of the hinge on the hood.
- Remove the gas-filled strut from the hinge. Refer to → Chapter "Gas-Filled Strut, Removing and Installing".
- Remove the nuts -arrows- from the hinge.
- Remove the front lid.
Installing
Install in reverse order of removal and note the following:
- Adjust the front lid. Refer to → Chapter "Front Lid, Adjusting".
Tightening Specifications
- Refer to → Chapter "Overview - Hood"
Front Lid, Adjusting
Adjustment Dimensions
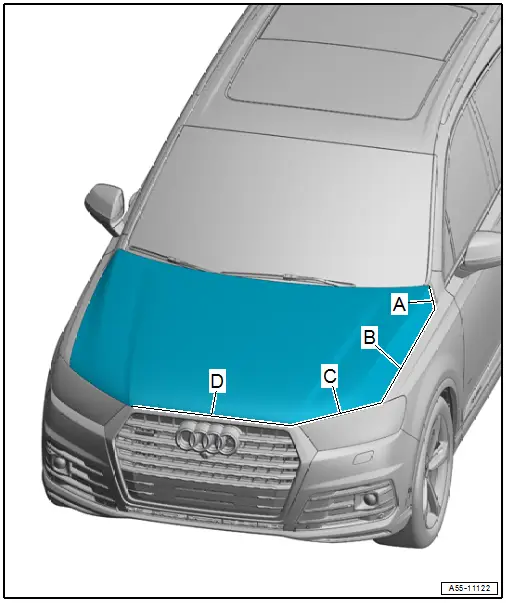
A - Hood to the Rear Fender
- Gap dimension = 2.9 mm
B - Front Lid to Front Bumper
- Gap dimension = 2.9 mm
C - Hood to Headlamp
- Gap dimension = 5.2 mm
D - Front Lid to Radiator Grille
- Gap dimension = 4.2 mm
Side, Length and Height Adjustment at Hinge
- Adjustment dimensions. Refer to → Chapter "Adjustment Dimensions".
Special tools and workshop equipment required
- Gauge - Gap Adjustment -3371-
Procedure
Side and Length Adjustment at Hinge:
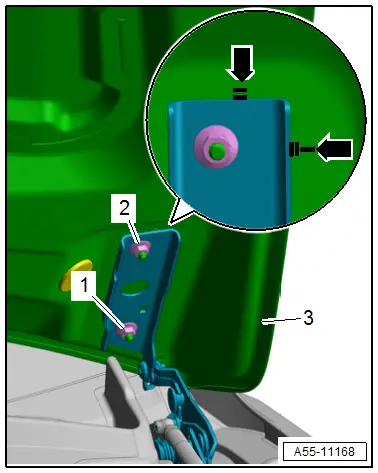
- Loosen the nuts -1 and 2-.
- Align the hood -3- side- and lengthwise according to the marks -arrows-.
- Tighten the nuts.
Tightening Specifications
- Refer to → Chapter "Overview - Hood"
Height Adjustment at Hinge:
- Loosen the bolts -1 and 3-.
- Adjust the height of the hinge -2-.
- Tighten the bolts.
Tightening Specifications
- Refer to → Chapter "Overview - Hood"
Side and Height Adjustment at Striker
- Adjustment dimensions. Refer to → Chapter "Adjustment Dimensions".
Special tools and workshop equipment required
- Gauge - Gap Adjustment -3371-
Procedure
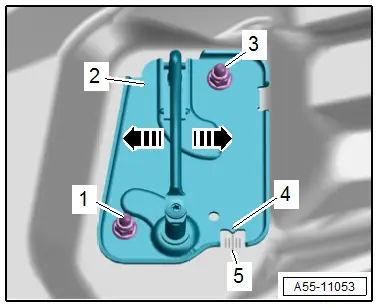
Side Adjustment at Striker:
- Loosen the nuts -1 and 3-.
- Move the striker -2-.
- Use the markings on the striker -4- and on the body -5- for the side adjustment.
- During the closing test, the lid must fall from the balance position into the latch and engage completely.
- Tighten nuts.
Tightening Specifications
- Refer to → Chapter "Overview - Hood"
Height Adjustment at Striker:
- Install the adjusting buffer completely. Refer to → Chapter "Height, Adjusting using Adjusting Buffer".
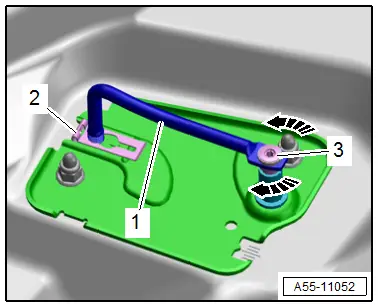
- Loosen the clip -2- by removing.
- Adjust the striker -1- by turning the adjusting screw -3--arrows-.
- During the closing test, the lid must fall from the balance position into the latch and engage completely.
- Adjust the striker height if necessary.
- Push the clip back on the striker.
Height, Adjusting using Adjusting Buffer
- Adjustment dimensions. Refer to → Chapter "Adjustment Dimensions".
Procedure
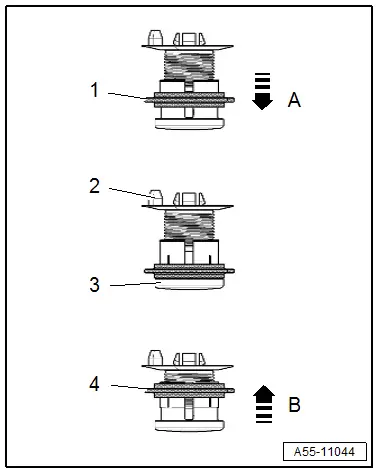
- Open the hood and release the retainer -1--arrow A-.
- Completely remove the stop -3- from the buffer -2-.
- Place the hood slowly on the stop until the hood gap dimension to the fender is reached.
- Open the hood and lock the retainer -4--arrow B-.