Audi Q7: Luggage Compartment Floor, Removing and Installing
Luggage Compartment Floor, Removing and Installing, Vehicle with High-Voltage System
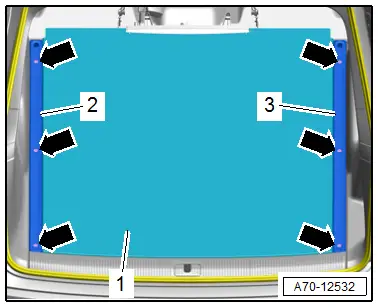
Removing
- Remove the bolts -arrows-.
- Remove the rails -2 and 3-.
- Remove the luggage compartment floor -1- toward the rear.
Installing
Install in reverse order of removal.
Installation instructions: for example tightening specifications, replacing components. Refer to → Chapter "Overview - Luggage Compartment Floor, Vehicles with High-Voltage System".
Luggage Compartment Floor, Removing and Installing, Upright Spare Tire
Removing
- Remove the spare wheel.
- Remove the spare tire bracket. Refer to → Chapter "Spare Tire Carrier, Removing and Installing".
- Remove the right rail. Refer to → Chapter "Rail, Removing and Installing".
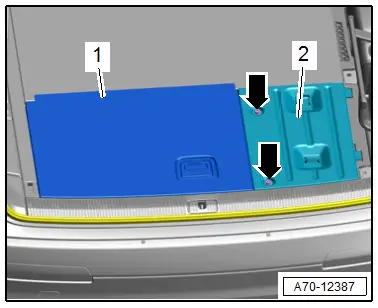
- Remove the left luggage compartment floor -1-.
- Remove the bolts -arrows-.
- Unclip the right luggage compartment floor -2- and remove.
Installing
Install in reverse order of removal.
Installation instructions: for example tightening specifications, replacing components. Refer to → Chapter "Overview - Luggage Compartment Floor, Upright Spare Tire".
Luggage Compartment Floor Bracket, Removing and Installing
Special tools and workshop equipment required
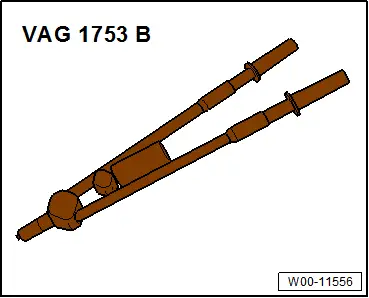
- Pop Rivet Pliers -VAG1753B-
- Hand drill
- Protective Eyewear
Removing
- Remove the luggage compartment floor panel. Refer to → Chapter "Luggage Compartment Floor, Removing and Installing, Upright Spare Tire".
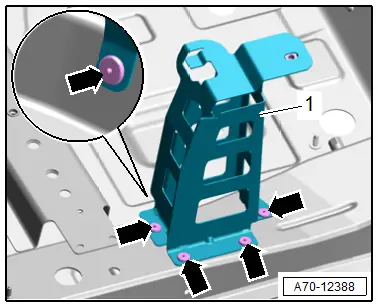
Front Bracket
 WARNING
Risk of eye injury.
Wear protective eyewear!
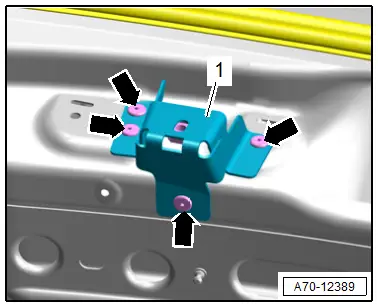
- Remove the pop rivets -arrows- and remove the bracket -1-.
Rear Bracket
- Remove the lock carrier trim panel. Refer to → Chapter "Lock Carrier Trim Panel, Removing and Installing".
 WARNING
Risk of eye injury.
Wear protective eyewear!
- Remove the pop rivets -arrows- and remove the bracket -1-.
Installing
Install in reverse order of removal.
Installation instructions: for example tightening specifications, replacing components. Refer to → Chapter "Overview - Luggage Compartment Floor, Upright Spare Tire".
Tie Down, Removing and Installing
Removing
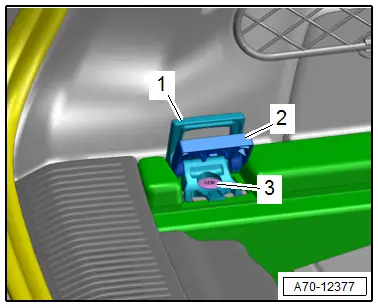
- Fold up the bracket -1- all the way.
- Unclip the cover -2- using a screwdriver and unfold all the way.
- Remove the bolt -3- and remove the tie down.
Installing
Install in reverse order of removal.
Installation instructions: for example tightening specifications, replacing components. Refer to → Chapter "Overview - Luggage Compartment Side Trim Panel, Vehicles without High-Voltage System".

