Audi Q7: Rail, Removing and Installing
Special tools and workshop equipment required
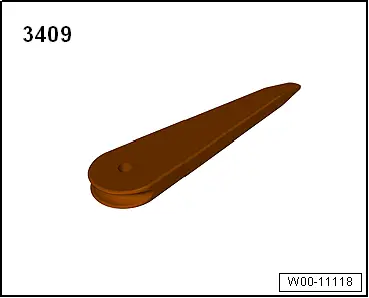
- Trim Removal Wedge -3409-
Removing
- Remove the luggage fastening strap or the telescopic luggage bar.
- Equipped on some models, front passenger side: remove the spare tire bracket. Refer to → Chapter.
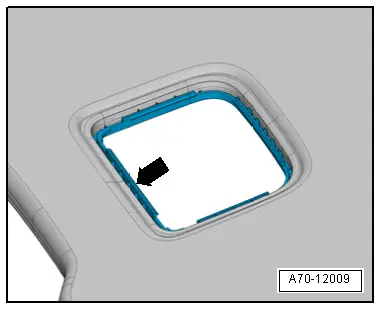
- Versions with 7 seats: unclip the rail cover -1- with the Trim Removal Wedge - 3409- and remove it -arrow-.
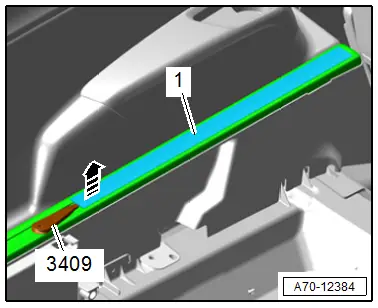
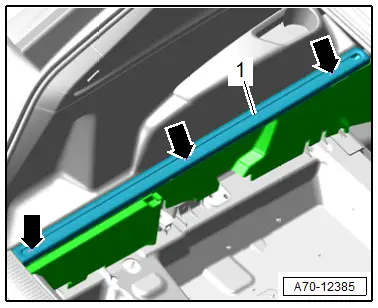
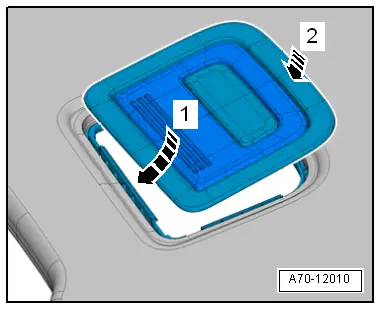
- Remove the bolts -arrows- and remove the rail -1-.
Installing
- If the luggage compartment floor is removed, mount the rail and tighten the bolts only hand-tight.
- Install the luggage compartment floor.
- Tighten the rail.
Further installation is the reverse order of removal.
Installation instructions: for example tightening specifications, replacing components. Refer to → Chapter "Overview - Luggage Compartment Floor".
Rear Luggage Compartment Floor Handle, Removing and Installing
Special tools and workshop equipment required
- Pry Lever -80-200-
Removing
- Remove luggage compartment floor.
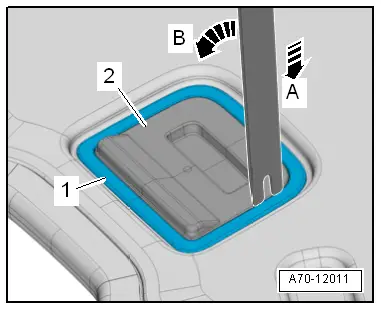
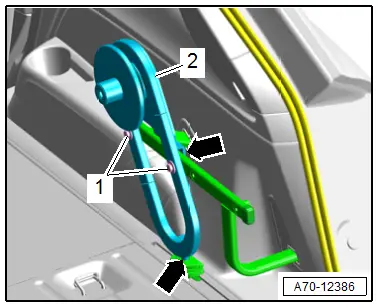
- Release the mounting bracket -1- from the underside of the luggage compartment floor.
- To do this position the -80 - 200- in direction of -arrow A-, and release the frame in direction of -arrow B-.
- Release the frame and remove the luggage compartment floor panel handle -2-.
Installing
Install in reverse order of removal and note the following:
- Position the mounting bracket -arrow- from below in the cut-out in the luggage compartment floor and hold.
- Push the luggage compartment floor panel handle opposite the direction of travel in the frame in direction of -arrow 1- and lock downward in direction of -arrow 2-.
Installation notes, for example tightening specifications, replacing components. Refer to → Chapter "Overview - Luggage Compartment Floor".
Spare Wheel Well Trim, Removing and Installing
Removing
- Equipped on some models: remove the third row bench seat. Refer to → Chapter "Cover and Cushion, Removing and Installing, Third Row Seat Pan".
- Remove the tool box and retaining strap.
- Equipped on some models: remove the spare tire.
- Remove the luggage compartment floor support. Refer to → Chapter "Luggage Compartment Support, Removing and Installing".
- Remove the subwoofer. Refer to → Communication; Rep. Gr.91; Sound System; Component Location Overview - Sound System.
- Remove the amplifier with bracket. Refer to → Communication; Rep. Gr.91; Sound System; Component Location Overview - Sound System.
- Disengage the spare tire well trim -1- and remove toward the rear.
- Versions with 7 seats: disengage the spare tire well trim and pull out under the seat.
Installing
Install in reverse order of removal.
Installation instructions: for example tightening specifications, replacing components. Refer to → Chapter "Overview - Luggage Compartment Floor".
Spare Tire Carrier, Removing and Installing
Special tools and workshop equipment required
- Trim Removal Wedge -3409-
Removing
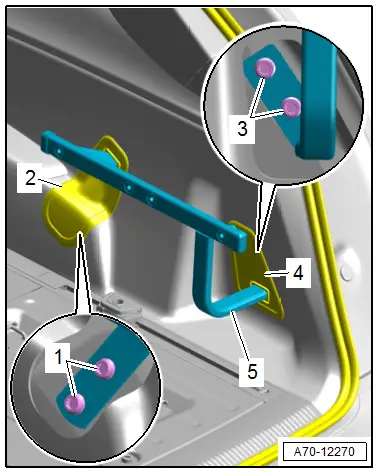
- Remove the spare wheel.
- Remove the bolts -1-, disengage the spare tire bracket -2- from the carrier and at the tie downs -arrows-.
- Pry out the covers -2 and 4- using the -3409- and remove from the luggage compartment side trim panel.
- Remove the bolts -1 and 3- and remove the spare tire carrier -5-.
Installing
Install in reverse order of removal.
Installation notes, for example tightening specifications, replacing components. Refer to → Chapter "Overview - Luggage Compartment Floor, Upright Spare Tire".

