Audi Q7: Rear Brake Caliper
Overview - Rear Brake Caliper
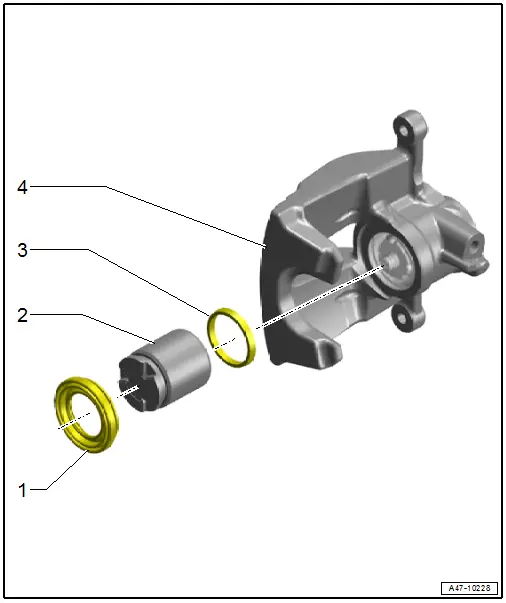
1 - Protective Cap
- Refer to → Chapter "Brake Caliper Piston, Removing and Installing"
2 - Brake Caliper Piston
- Refer to → Chapter "Brake Caliper Piston, Removing and Installing"
- Thinly coat with Lithium Grease -G 052 150 A2-
3 - Gasket
- Refer to → Chapter "Brake Caliper Piston, Removing and Installing"
4 - Brake Caliper
Brake Caliper Piston, Removing and Installing
Special tools and workshop equipment required
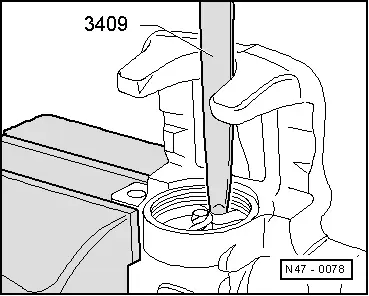
- Trim Removal Wedge -3409-
Removing
- The brake caliper is removed. Refer to → Chapter "Brake Caliper, Replacing".
- The parking brake motor is removed. Refer to → Chapter "Left and Right Parking Brake Motor - V282-/-V283-, Removing and Installing".
 Note
Note
- Install the entire repair kit when servicing.
- To clean the brakes only use mineral spirits.
- Thinly coat the brake cylinder, brake caliper piston and seal with Lithium Grease -G 052 150 A2-.
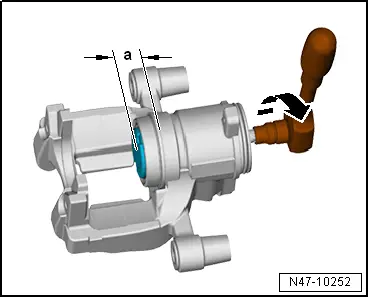
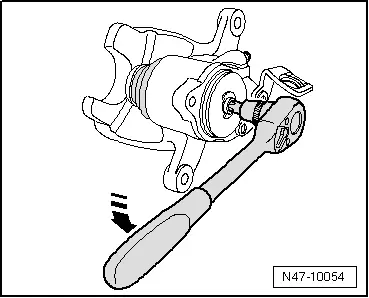
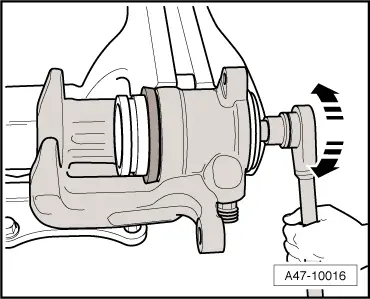
- Using an 8 mm internal multi-point socket, turn the spindle counter-clockwise -arrow-. As a result, the thrust nut pushes the brake caliper piston out of the brake caliper.
- Remove the brake caliper piston with the protective cap from the brake caliper.
- Remove the gasket using the Trim Removal Wedge -3409-.
- Clean the surfaces on the brake caliper piston and gasket only with mineral spirits and then dry.
Installing
- Thinly coat the brake caliper piston and the gasket with Lithium Grease -G 052 150 A2- before installing.
- Insert the gasket into the brake caliper.
- Place the protective cap with outer sealing lip on the brake caliper piston.
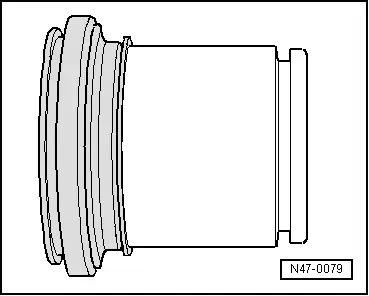
- Turn the thrust nut far enough onto the spindle so that the dimension -a- = 15 mm is reached.

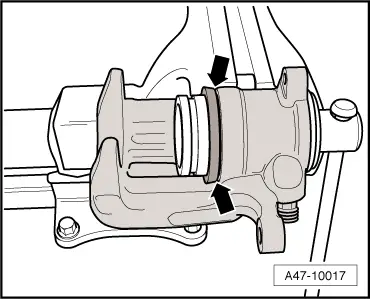
- Insert the inner sealing lip of the protective cap into the groove -arrows- in the brake caliper using the Trim Removal Wedge -3409-.
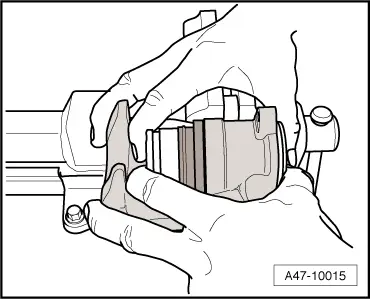
- Slide the brake caliper piston -1- onto the thrust nut, which is only possible in four positions.
- Carefully press the brake caliper piston into the brake caliper by moving the brake caliper piston.

- Press the brake caliper piston far enough into the brake caliper until it touches the thrust nut.
- Carefully turn the spindle clockwise in direction of -upper arrow- until the thrust nut is at the stop.
- The protective cap must fully contact the brake caliper -arrows-.
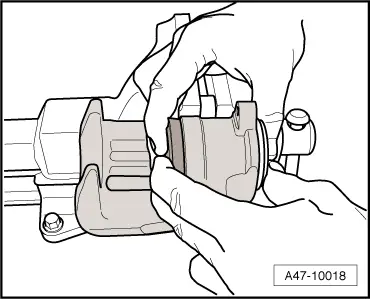
- Press the brake caliper piston into the brake caliper by hand.
- Outer sealing lip of protective cap will then engage in the brake caliper piston groove.