Audi Q7: Headrest, Removing and Installing
Headrest, Removing and Installing, Headrest with Height Adjuster
Removing
- Set the backrest toward the rear at an angle.
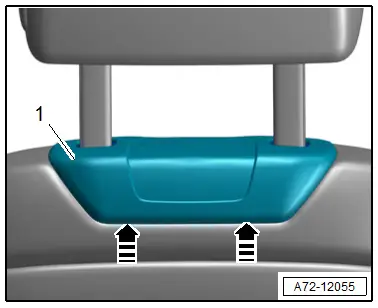
- Grab the rear cover -1- at the lower edge and slide upward out of the locking mechanism -arrows-.
- Move the headrest all the way up.
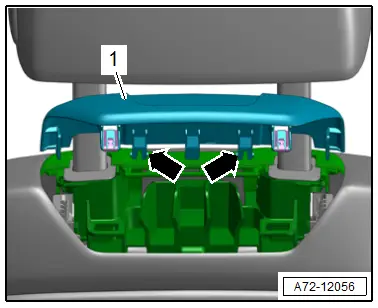
- Press down the release ring -arrow- on the left headrest guide and pull the headrest upward at the same time.

Installing
Install in reverse order of removal.
Installation notes, for example tightening specifications, replacing components. Refer to → Chapter "Overview - Headrest, with Height Adjustment".
Headrest, Removing and Installing, Headrest with Height and Angle Adjuster
Removing
- Set the backrest toward the rear at an angle.
- Grab the rear cover -1- at the lower edge and slide upward out of the locking mechanism in direction of -arrows-.
- Move the headrest completely upward and forward.

- Fold the rear trim -1- upward and disengage the hooks -arrows- from the front cover.
- Loosen the front trim -1- at both retainers -arrows- using a small screwdriver and remove it.

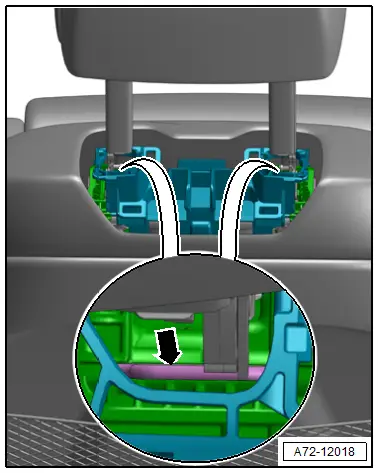
- Slide the gap covers upward, disengage the springs -arrow- toward the rear alternating at both headrest guides, and pull the headrest base upward at the same time.
Installing
Install in reverse order of removal.
Installation notes, for example tightening specifications, replacing components. Refer to → Chapter "Overview - Headrest, with Headrest and Angle Adjustment".
Headrest Guide, Removing and Installing
Headrest Guide, Removing and Installing, Headrest with Height Adjuster
Removing
- Remove the backrest seat cover and cushion. Refer to → Chapter "Backrest Cover and Cushion, Removing and Installing, Seat without Pneumatic Components".
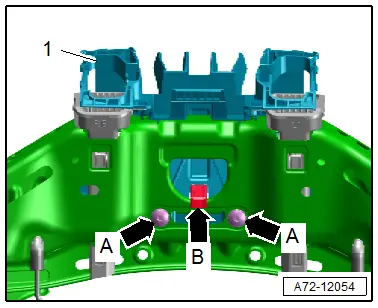
- Remove the bolts -arrows A-.
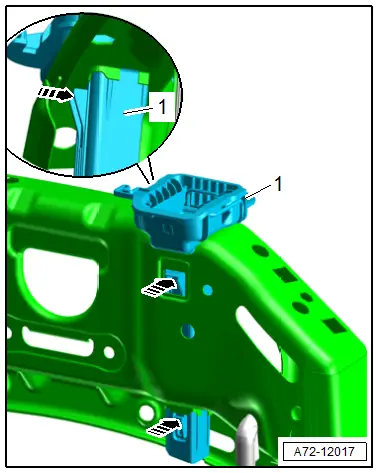
- Release the tab -arrow B- and remove the cover -1-.
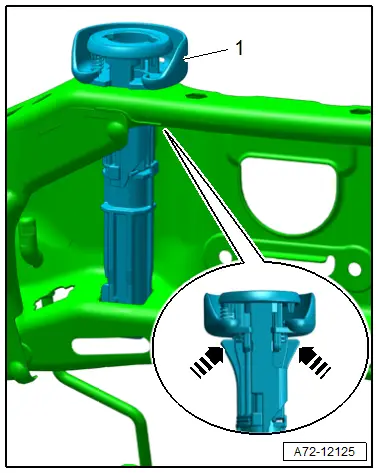
- Press the tabs down at the same time in direction of -arrows-.
- Remove the headrest guide -1- upward.
Installing
Install in reverse order of removal.
Installation notes, for example tightening specifications, replacing components. Refer to → Chapter "Overview - Headrest, with Height Adjustment".
Headrest Guide, Removing and Installing, Headrest with Height and Angle Adjuster
Removing
- Remove the backrest seat cover and cushion. Refer to → Chapter "Backrest Cover and Cushion, Removing and Installing".
- Remove the bolts -arrows A-.
- Release the tab -arrow B- and remove the cover -1-.

- Press the tabs down at the same time in direction of -arrows-.
- Remove the headrest guide -1- upward.
Installing
Install in reverse order of removal.
Installation notes, for example tightening specifications, replacing components. Refer to → Chapter "Overview - Headrest, with Headrest and Angle Adjustment".

