Audi Q7: Interior Door Mechanism, Removing and Installing
Removing
- Remove the door trim panel. Refer to → Chapter "Front Door Trim Panel, Removing and Installing".
- Remove the trim molding. Refer to → Chapter "Trim Molding, Removing and Installing".
- Place the trim panel on a soft surface.
- Remove the insulation mat.
- Disconnect the connectors at the rear of the door trim panel.
- If equipped, remove the ambient lighting lamp. Refer to → Electrical Equipment; Rep. Gr.96; Lamps; Component Location Overview - Door Ambient Lighting.
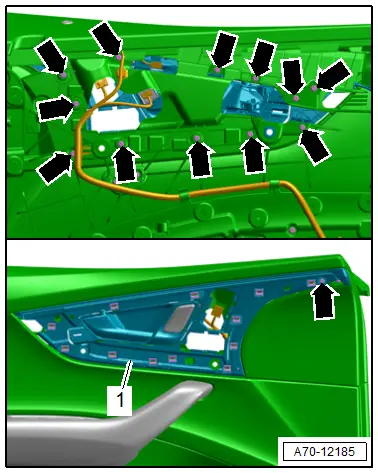
- Remove the bolts -arrows-.
- Pull the interior door mechanism -1- from the door trim panel and remove it.
Installing
Install in reverse order of removal.
Installation notes, for example tightening specifications, replacing components. Refer to → Chapter "Overview - Front Door Trim Panel".
Window Frame Trim, Removing and Installing
Special tools and workshop equipment required
- Trim Removal Wedge -3409-
Removing
- Lower the door window.
- Remove the door trim panel. Refer to → Chapter "Front Door Trim Panel, Removing and Installing".
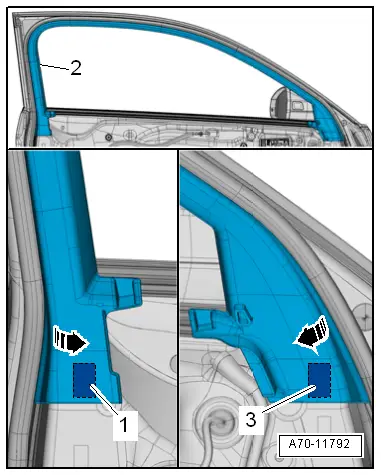
- Loosen the trim on the ends from the adhesive pads -1 and 3- from the door, using the -3409-.
- Pry off the window frame trim -2- starting at the bottom and working along the length of the window guide to the upper rear in direction of -arrows-.
- Remove the trim downward from the window frame.
Installing
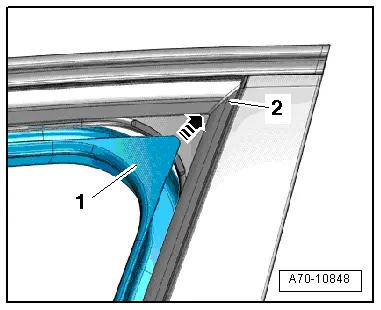
- Insert window frame trim -1- at upper rear in the window guide -2- in direction of -arrow-.
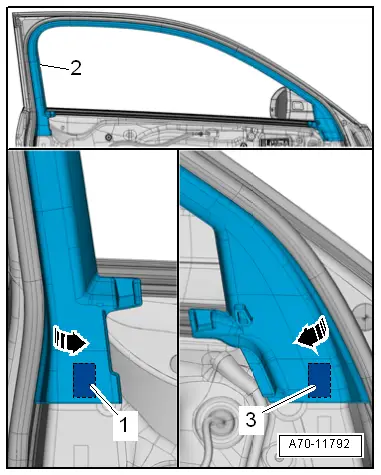
- Install window frame trim -2- along the entire length of the window guide.
- Remove all new part protective foil from the adhesive pads.
- Push the trim in the area of the adhesive pads firmly -1, and 3- against the door.
 Note
Note
Ignore the -arrows-.
Further installation is the reverse order of removal.
Installation notes, for example tightening specifications, replacing components. Refer to → Chapter "Overview - Front Door Trim Panel".
Trim Molding, Removing and Installing
Special tools and workshop equipment required
- Wedge Set -T10383-
Removing
- Unclip the trim -1- using the -T10383/1- in direction of -arrow-, disengage the trim at the door trim panel and remove it.
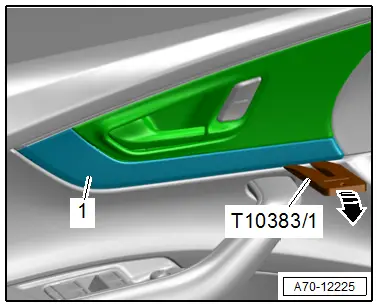
- Unclip the trim -1- with the -T10383/1- in direction of -arrow- and remove it.
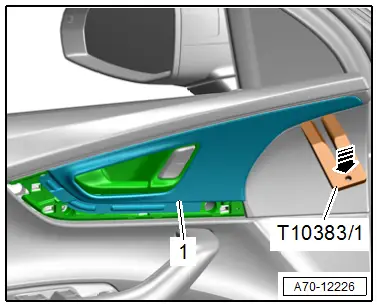
Installing
Install in reverse order of removal.
Installation notes, for example tightening specifications, replacing components. Refer to → Chapter "Overview - Front Door Trim Panel".

