Audi Q7: Rear Lid Lower Trim Panel, Removing and Installing
Special tools and workshop equipment required
- Pry Lever -80-200-
- Omega Clip Tool -T40280-
Removing
- Remove the rear lid closing button. Refer to → Electrical Equipment; Rep. Gr.96; Controls; Rear Lid Lock Button in Luggage Compartment E406, Removing and Installing.
- Remove the rear lid lamp. Refer to → Electrical Equipment; Rep. Gr.96; Lamps; Component Location Overview - Luggage Compartment Lamps.
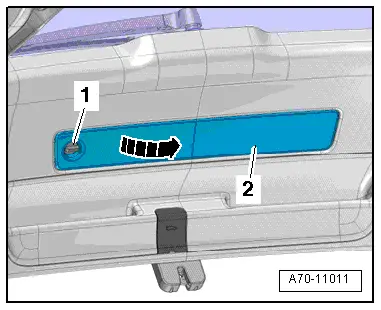
- Turn the quick release -1- 90º counter-clockwise and move the emergency triangle cover -2- to the side in direction of -arrow-.
- Remove the emergency triangle.
- Disengage the cover on the lower trim and remove it.
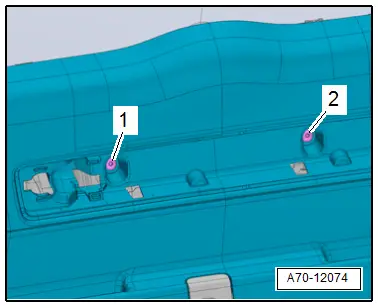
- Remove the bolts -1 and 2-.
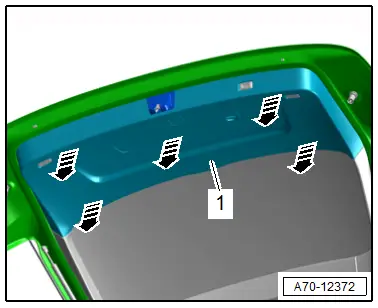
- Grasp the trim panel -1- with a hand by reaching into the installation opening for the rear lid lamp and pull the trim panel off of the rear lid with a jerk in direction of -arrows-.
- Unclip the rest of the trim panel clips using the -80 - 200- and remove the trim panel.
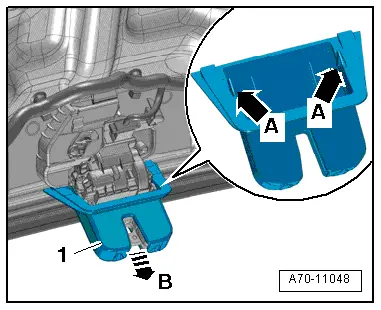
- If equipped, release the retaining tabs -arrows A- with a screwdriver, and remove the rear lid trim -1- in direction of -arrow B-.
Installing
Install in reverse order of removal.
Installation notes, for example tightening specifications, replacing components. Refer to → Chapter "Overview - Rear Lid Lower Trim Panel".
Rear Lid Upper Trim Panel, Removing and Installing
Special tools and workshop equipment required
- Pry Lever -80-200-
- Omega Clip Tool -T40280-
Upper Trim Panel, Removing
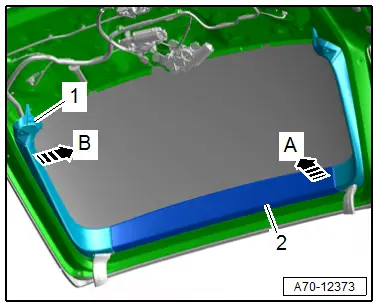
- Unclip the upper trim panel -2- from the side trim panel -arrow A- using the -80 - 200-.
- Unclip the rest of the trim panel clips and trim panel and remove it.
Side Trim Panel, Removing
- Remove the rear lid lower trim panel. Refer to → Chapter "Rear Lid Lower Trim Panel, Removing and Installing".
- Unclip the side trim panel -1- from the rear lid -arrow B- using the -80 - 200-.
- Unclip the rest of the trim panel clips and trim panel and remove it.
Installing
Install in reverse order of removal.
Installation notes, for example tightening specifications, replacing components. Refer to → Chapter "Overview - Rear Lid Upper Trim Panel".

