Audi Q7: Screen Separator Mounting Eye, Removing and Installing
Removing
- Remove the headliner and lay it on the seats. It is not necessary to remove it from the vehicle. Refer to → Chapter "Headliner, Removing and Installing".
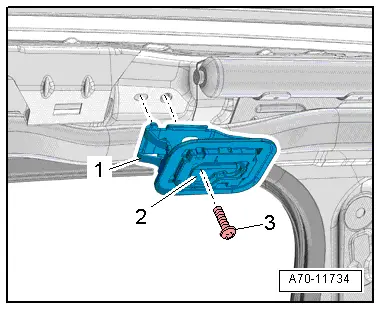
- Press the cap -2- toward the rear and remove the bolt -3- that is situated behind it. Then remove the screen separator mounting eye -1-.
Installing
 WARNING
- Follow all safety precautions when working on pyrotechnic components. Refer to → Chapter "Safety Precautions for Pyrotechnic Components".
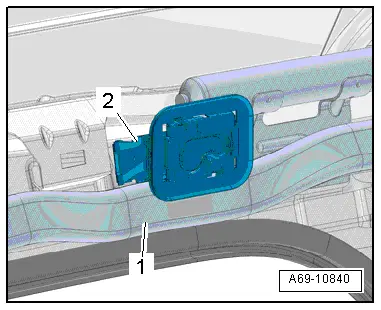
- When installing the front mounting eye -2-, do not pinch the head curtain airbag -1-.
Install in reverse order of removal and note the following:
- Press the head curtain airbag -1- under the screen separator mounting eye -2- as shown in the illustration.
Installation Notes, for example tightening specifications, replacing components. Refer to → Chapter "Overview - Screen Separator".
Sun Visor, Removing and Installing
Removing
- Disengage the sun visor from the center support.
- Double sun visor: remove the center support for the sun visor. Refer to → Chapter "Sun Visor Center Support, Removing and Installing".
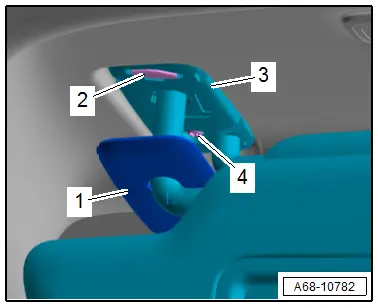
- Unclip the cover -1- with a screwdriver and remove the bolts behind it -4-.
- Release the expander wedge -2- with a screwdriver and unclip the sun visor mount -3- downward from the mounting.
- If installed, disconnect the connector and remove the sun visor.
Installing
Install in reverse order of removal.
Installation notes, for example tightening specifications, replacing components. Refer to → Chapter "Overview - Sun Visors".
Sun Visor Center Support, Removing and Installing
Removing
- Disengage the sun visor at the sun visor center mount and flip to the side.
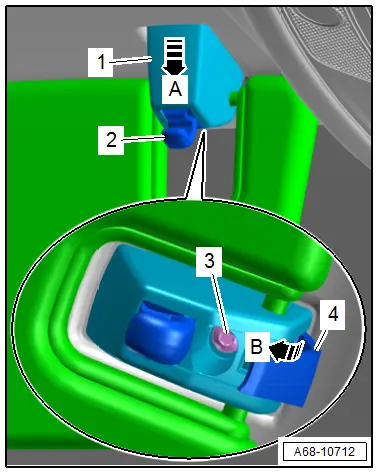
- Unclip the cap -4- with a screwdriver and remove the bolt -2- behind it.
- Loosen the cover -1- from the center mount starting at the rear up to the first catch in direction of -arrow A-.
- Unclip the front cover from the headliner in direction of -arrow B-.
- Disengage and remove the center mount -2- for the sun visor with the cover from the headliner.
Installing
Install in reverse order of removal.
Installation notes, for example tightening specifications, replacing components. Refer to → Chapter "Overview - Sun Visors".

