Audi Q7: Selector Shaft Seal, Replacing
Procedure
 Caution
This procedure contains mandatory replaceable parts. Refer to component overview prior to starting procedure.
Mandatory Replacement Parts
- Seal - Selector lever
- Spring Pin
- Remove the Mechatronic. Refer to → Chapter "Mechatronic, Removing and Installing".
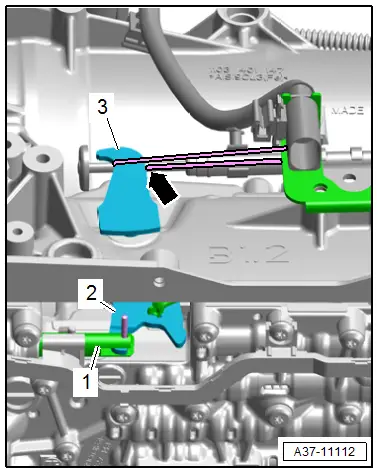
- Remove the cable tie -arrow- on the selector lever -3-.
 Caution
Installation is difficult due to the latched parking lock.
- The parking lock must not be latched for the following work. Turn the driveshaft to see if the parking lock is latched.
- Move the transmission output shaft with the splines so that the parking lock is not latched. Do not turn the driveshaft further.
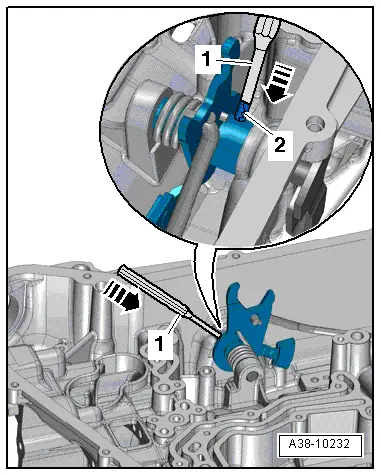
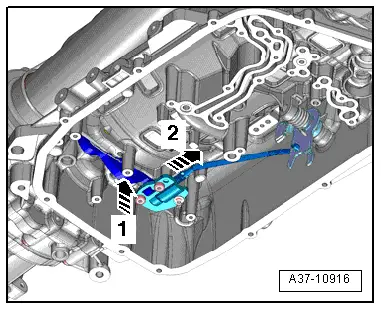
- Remove the spring pin -2- on the shaft for the selector lever using a pin punch -1-.
 Note
Note
The tension on the return spring is reduced when the parking lock emergency release transmission shift lever is removed.

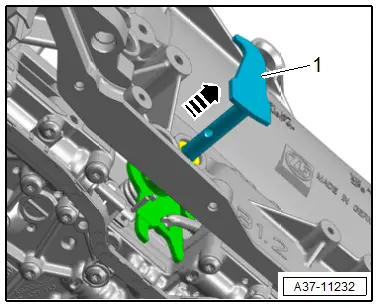
- Remove the selector lever -1- and shaft in direction of -arrow-.
- Remove the seal with a small screwdriver.
- Apply ATF to the outer edge and the space between the sealing lips of the new seal.
- Installation position: open side of the seal faces the transmission.
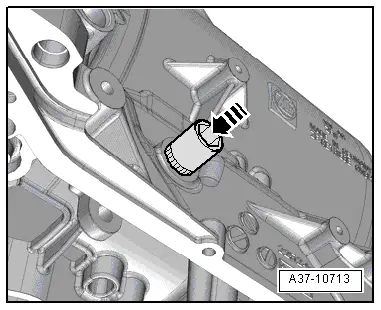
- Mount the seal on the transmission housing and push it in all the way using a suitable socket in direction of -arrow-.
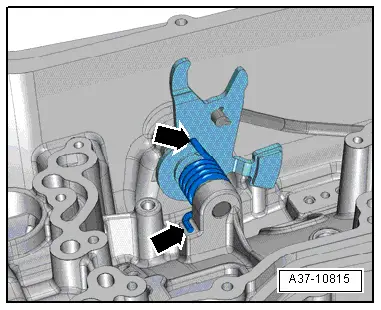
- Install the selector lever and shaft and attach the return spring to the stop lever and to the transmission housing -arrows-.
 Note
Note
If the actuator rod for the locking latch moves too far to the rear, then it can be pulled forward in direction of -arrow 1- while pushing the locking latch at the same time in direction of -arrow 2-.
- Drive in the tensioning pin -2- on the selector lever shaft using a pin punch -1- at the same time pay attention to the installation position. Refer to → Fig. "Spring Pin Installation Position".
- Install the Mechatronic. Refer to → Chapter "Mechatronic, Removing and Installing".
- Fill with ATF. Refer to → Chapter "ATF Level, Checking".
- Check the parking lock emergency release. Refer to → Chapter "Emergency Release from P".