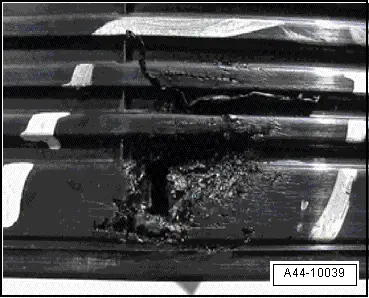
Audi Q7: Tires with emergency running characteristics, PAX
 Caution
It is mandatory for run-flat tires to have a tire pressure monitoring system in the vehicle.
Work on tires with emergency running characteristics (PAX) must only be performed at skilled facilities.
These have the corresponding trained personnel and necessary tools available.
PAX Tires, Construction
 Caution
It is mandatory for run-flat tires to have a tire pressure monitoring system in the vehicle.
PAX tires involve specially developed system that exhibits the following differences in comparison to conventional tires:
Pax tires with supporting ring
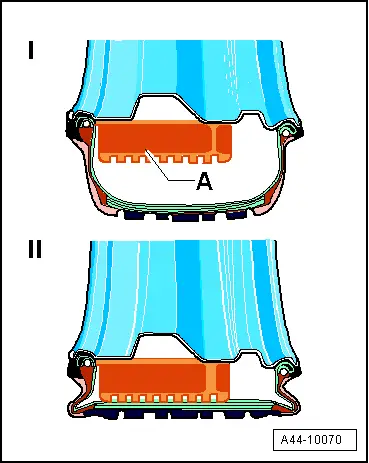
- -I- PAX tires with air
- -II- PAX tires without air
- The tire is anchored to a special rim that prevents it from sliding off when pressure is lost. The rubber supporting ring ensures stability in emergency operation.
- The inner and outer bead diameter are different sizes. This makes it possible to place the tire in a supporting ring.
- The tire is anchored to the rim differently.
- In this way, the tire height could be reduced considerably. That was possible because the area near the bead could be considerably smaller due to the special connection between the tire and rim.
- The tire bead is formed so that it can engage in the rim seat. Therefore, it remains firmly in the seat when pressure is lost.
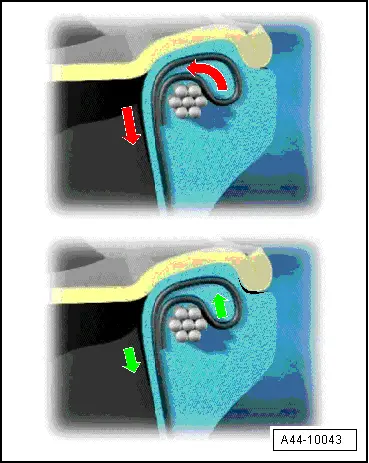
Standard tire, beat area construction
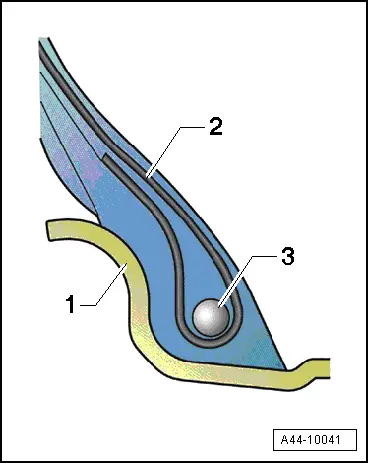
1 - Rim flange
2 - Fabric shell
3 - Bead bundle
PAX tire, bead area construction
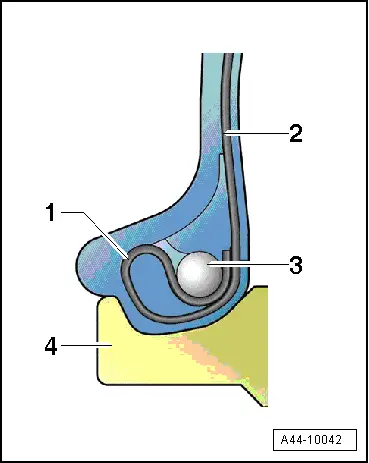
1 - Loop
2 - Fabric shell
3 - Bead bundle
4 - Rim flange
PAX tires, anchoring
The secure seating of the tire in the rim is ensured in all driving situations due to the type of construction.
A wedge-shaped component of the tire is pressed between the bead bundle and rim when loaded. This happens independently of the pressure in the tire.
PAX tires, dimensions
In contract to conventional tires, tires with emergency running characteristics (PAX) exhibit differences in regard to dimensions and designations.
Therefore, PAX tires can only be mounted on special rims (PAX).
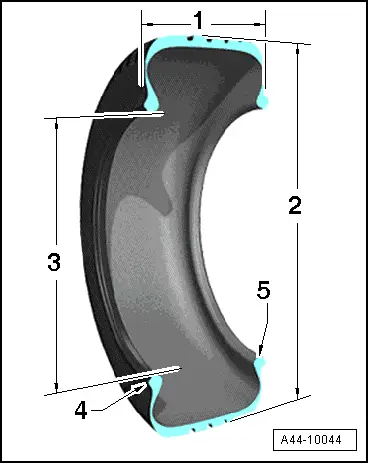
1 - Width in mm: the tire width from flank to flank on standard rim (corresponds to width specification on standard tire)
2 - Outer circumference in mm: maximum diameter of a new tire
3 - Designated diameter in millimeters on standard rim seat
4 - Smaller bead diameter in millimeters: rim seat on outer side
5 - Larger bead diameter in millimeters: rim seat on inner side
PAX Tires, Designations
In contrast to conventional tires, other designations are found on the tire flanks of PAX tires. In this way, these tires can be allocated clearly.
PAX tires, designations
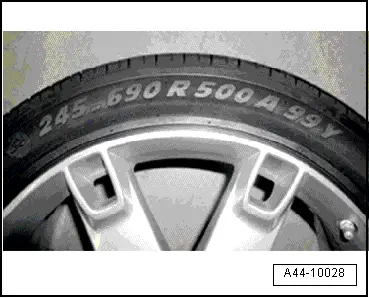
245 - Tire width in millimeters
690 - Outer diameter in millimeters
R - Radial construction
500 - Designated diameter on standard rim seat
A - Tire quality grading for PAX tires (A- "asymmetrical") because both rim seats have different diameters
99 - Indicator of maximum load permitted for this tire (99 = 1550 kg (3417 lb)
Y - Speed code letter ("Y") corresponds to a permitted maximum speed of 300 km/h (186 mph)
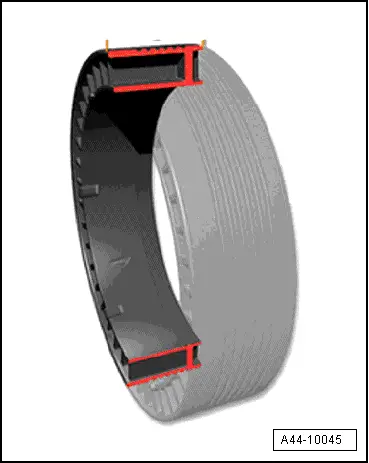
Support Ring on PAX Wheels
Dimensions
Overview of the most important dimensions:
Designations
Example: 90-500(35) CLI A 1 876107
90 - Designated width in millimeters
500 - Designated diameter in millimeters
35 - Height in millimeters
CLI - Support ring versions: CLI - Clip supporting ring/FL - standard supporting ring
A - Build type index, asymmetrical. Indication of wheels with emergency running characteristics (PAX)
1 - Supporting ring versions
876107 - CAI, international item code
Dimensions and Designations on PAX Rims
Example: 235 x 500 A - 5 - 41
235 - Designated width in millimeters
x - One-part
500 - Designated diameter of standardized rim seat in millimeters
A - Asymmetrical
5 - Number of bolt holes
41 - Offset in millimeters
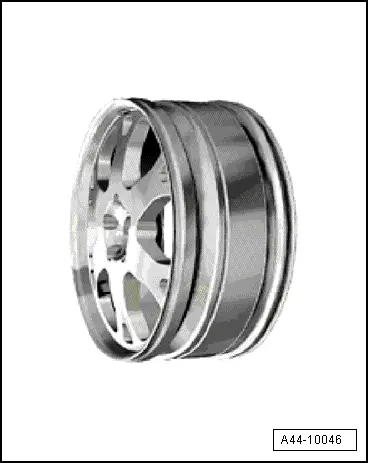
Tire Inflation on PAX Wheels
When filling tires, pay special attention to the following points:
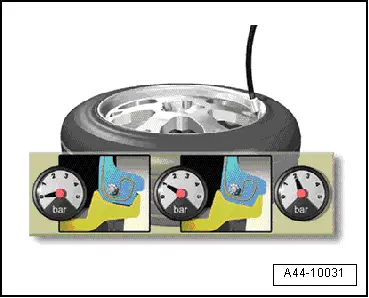
- After mounting the tires with inserted valve insert, fill with air. At 1 bar (14.5 psi), check whether both beads are seated correctly.
- If one of the beads is not seated correctly, do not deflate air from tire but rather position the assembly roller on the affected beat and press on by rotating slightly. The bead then seats itself.
- Then continue filling until the tire pressure recommended for the vehicle is reached. Tires can also be filled with tire filling gas as with conventional tires.
 Note
Note
Do not briefly overinflate tires to 3.5 bar (50.76 psi) as is common with conventional tires.
Vehicle Alignment and Adjustment
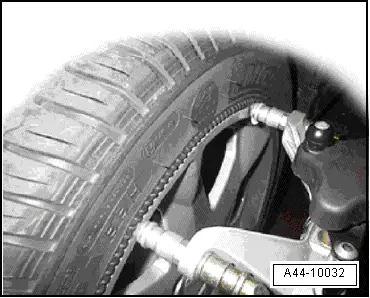
The chassis adjustment is done on vehicle with tires with emergency running characteristics (PAX) in the same way as on vehicle that are equipped with conventional tires.
Generally, the same gauge heads and mounts that are suitable for conventional tires with a rim protection strip can be used for tires with emergency running characteristics (PAX). (Supports on inner side, mount in tire tread).
Tires with Emergency Running Characteristics (PAX), Repairing
General Information
It is generally not necessary to replace a tire after going flat and after driving on a flat tire.
 Note
Note
The affected tire should be removed and checked for damaged by trained professionals. Assembly work and damage diagnosis on the affected tire should only be performed by trained personnel.
Proceed as follows to examine a tire with emergency running characteristics (PAX) after going flat:
- First, the remaining gel must be removed from the tire. The flat side of the spatula is suitable for this
- Then clean the tire and supporting ring with water and a cloth to remove the remaining gel residue
- After separating tire and supporting ring, evaluate both of these components (PAX) according to the criteria described in the following section
Additional information:
- When remounting, ensure the used supporting ring fits the tire and rim dimensions
- The rim must be inspected before mounting, as with conventional wheel/tire systems
- A damaged rim should be replaced
PAX Tires, Examining
Pay special attention to the following criteria when examining the tire:
- Surface erosion or marbling on the inner side (pressure was too low or insufficient for the load)
- Detached rubber or loose cords
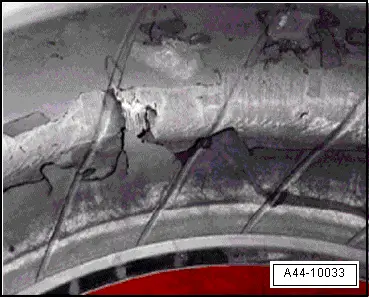
- Exposed or deformed bead bundle
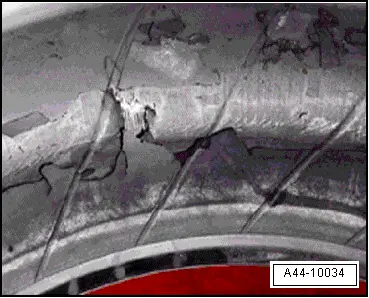
- Damage to tire bead with visible cords
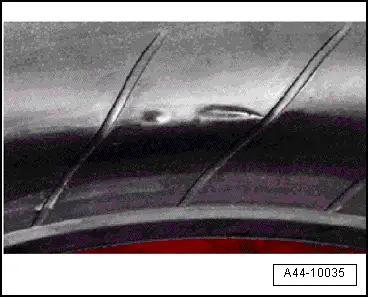
Supporting Ring, Examining
As with the tire, the supporting ring is generally not replaced after driving with flat tire.
Replace the support ring if the following damages have occurred:
- Blowouts or missing parts
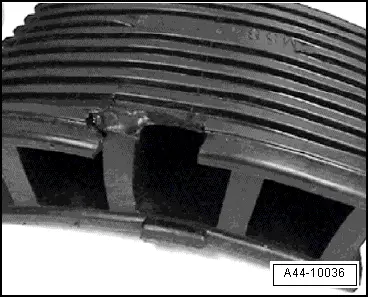
- Cracks in partitions
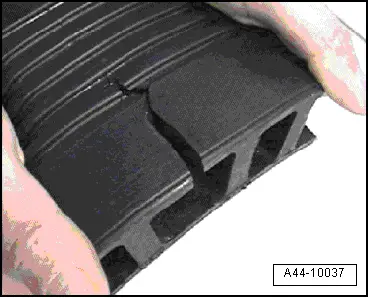
- Stitch damage and holes
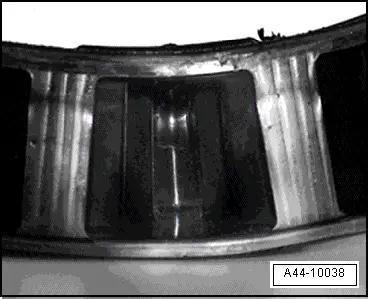
- Bubbles and discoloration due to overheating
Repairs on Tires
 Note
Note
- Repairs on tires with emergency running characteristics (PAX) must not be performed with adhesive tape.
- Tire repair sprays must not be used on tires with emergency running characteristics (PAX) because these products are not compatible with the gel in the tires.
