Audi Q7: Trim Molding, Removing and Installing
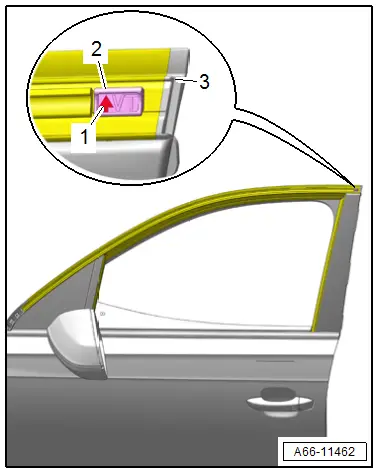
Trim Molding, Removing and Installing, Front Door
Removing
- Using a small screwdriver -2-, pry the trim molding -1- out of the clip at the opening -arrow-.
- Carefully pry the entire length of the trim molding out of the window guide -3- and remove it.

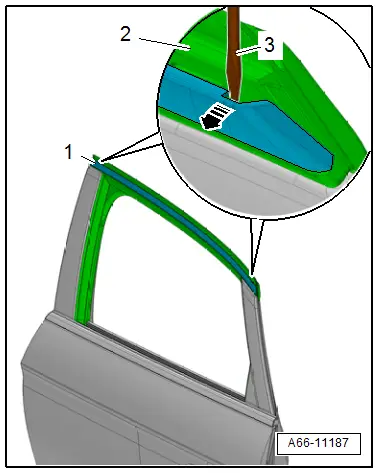
Installing
Install in reverse order of removal and note the following:
- The arrow -1- on the clip -2- must point upward.
- "VT" = Front door
- Align the trim molding -1- on the B-pillar door flange, and insert it from below into the clip -3- and window guide -2-.
 Note
Note
For an easier installation, spray the seal with soapy water, for example.
- Push on the entire length of the trim molding.

Trim Molding, Removing and Installing, Rear Door
Removing
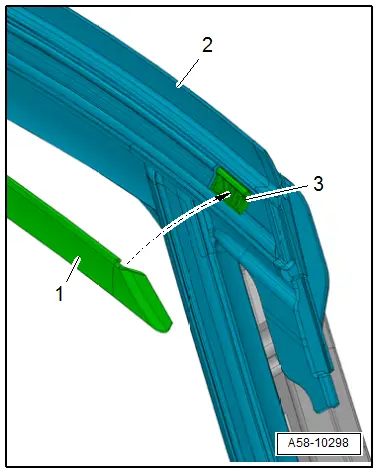
- Using a small screwdriver -3-, pry the trim molding -1- out of the clip at the opening -arrow-.
- Carefully pry the entire length of the trim molding out of the window guide -2- and remove it.
Installing
Install in reverse order of removal and note the following:
- With the trim molding still removed, the parallel alignment of the trim molding mount in the window guide to the front door and to the side window must be checked.
- The trim molding mount -2- must be parallel -3- with the front door trim molding -1-.
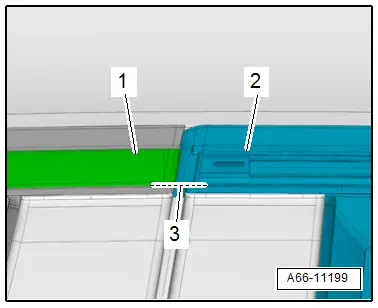
- The trim molding mount -1- must be parallel -3- with the side window trim molding -2-.
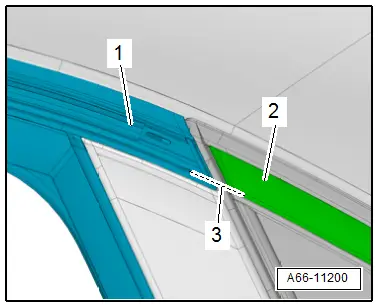
- There are colored clips for correct adjustment and checking.
- -a- = + 1.0 mm
- -b- = Normal position
- -c- = -1.0 mm
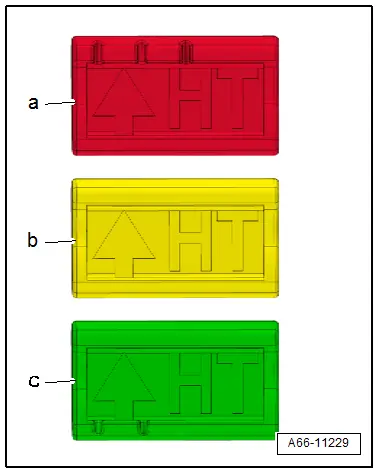
- Push a new clip -1- into the window guide mounting -3-.
- The arrow -2- must point upward.
- "HT" = Rear door
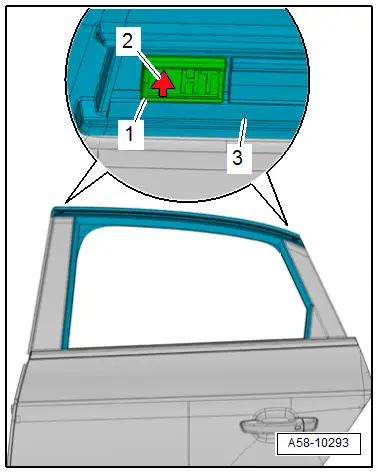
- Align the trim molding -1- on the C-pillar door flange, and insert from below into the clips -3- and window guide -2-.
 Note
Note
For an easier installation, spray the seal with soapy water, for example.
- Push on the entire length of the trim molding.
Trim Molding, Removing and Installing, Side Window
Removing
- Remove the side window. Refer to → Chapter "Rear Side Window, Removing and Installing".
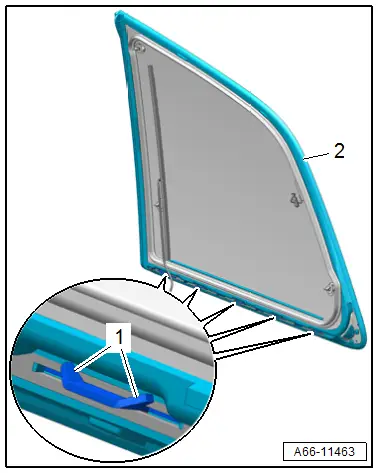
- Bend the tabs -1- straight.
- Carefully pry the trim molding -2- out of the window guide and remove.
Installing
Install in reverse order of removal.

