Audi Q7: Battery Charger -VAS5906-
 WARNING
Risk of injury. Follow all warning messages and safety precautions. Refer to → Chapter "Warnings and Safety Precautions".
 WARNING
Do not check or charge a Battery -A- when the visual indicator has "no color or is bright yellow". Jump starting must not be used!
There is a risk of explosion during testing, charging or jump starting.
These Batteries -A- must be replaced.
 Note
Note
Observe the Battery Charger -VAS5906- Operating Instructions.
- Battery Charger -VAS5906- device description. Refer to → Chapter "Battery Charger -VAS5906- Device Description".
- Charge the Battery -A-. Refer to → Chapter "Battery, Charging with Battery Charger -VAS5906-".
Battery Charger -VAS5906- Device Description
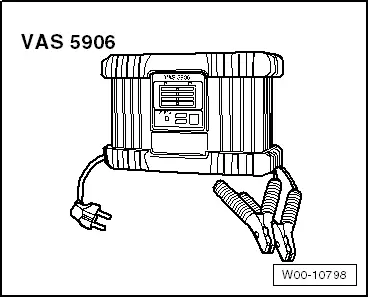
Battery Charger -VAS5906-
The Battery Charger -VAS5906- was developed especially for charging the vehicle electrical system while the vehicle is on display.
It supplies for automatic charging of 3 - 300 Ah for starter batteries.
The 14.4 V maximum charging voltage is not exceeded. All electrical consumers will be supported up to 30 A by the support charging.
After the battery -A- is completely charged, the Battery Charger -VAS5906- switches into the maintenance charging for long-term operation.
The Battery Charger -VAS5906- starts automatically and does not need any adjustments. Only the charging terminals and the network cable need to be connected.
For more information. Refer to the Battery Charger -VAS5906- Operating Instructions.
Control Field Overview
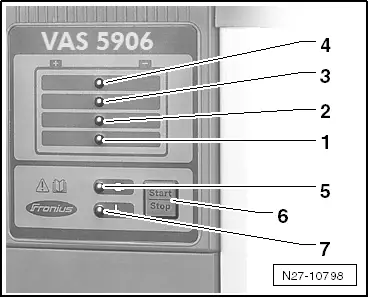
1 - 25% charge display
2 - 50% charge display
3 - 75% charge display
4 - 100% charge display
5 - Ready-to-use display
6 - Pushing the START/STOP and Setup buttons will stop and start the charging process. Enter into the setup menu and select characteristic line type (hold for 10 seconds)
7 - Display malfunction
Battery, Charging with Battery Charger -VAS5906-
 WARNING
Risk of injury. Follow all warning messages and safety precautions. Refer to → Chapter "Warnings and Safety Precautions".
 WARNING
Do not check or charge a Battery -A- when the visual indicator has "no color or is bright yellow". Jump starting must not be used!
There is a risk of explosion during testing, charging or jump starting.
These Batteries -A- must be replaced.
Special tools and workshop equipment required
- Battery Charger -VAS5906-
Procedure
- Place the Battery Charger -VAS5906- in the engine compartment or under the vehicle.
- Connect the Battery Charger -VAS5906- to the power supply.
The Battery Charger -VAS5906- is in idle, the display comes on when it is "ready to be used".
 WARNING
Risk of injury. Follow all warning messages and safety precautions. Refer to → Chapter "Warnings and Safety Precautions".
 Caution
- Turn off the ignition and all electrical equipment.
- Remove the key.
- Connect the red charge terminal (+) to the positive terminal of the Battery -A-.
 Note
Note
On vehicles with a Start/Stop function and an installed Battery Monitoring Control Module -J367-, the black charge terminal (-) must be connected to the body ground. The Start/Stop system will malfunction when it is connected to the Battery -A- negative terminal.
- Connect the black charge terminal (-) to the negative terminal of the Battery -A-/negative connector.
The charging process starts after approximately two seconds.
LEDs show the Battery -A- charge level. When all the lamps are on, the Battery -A- is charged.
When the Battery -A- is completely charged, the Battery Charger -VAS5906- automatically switches to maintenance charging.
 Caution
Sparks can result if the charging terminals are removed too early. End the charging process by pressing the START/STOP button.
Battery -A- Charging, Ending
- Press the START/STOP-button.
- Remove the charging clamps from the battery terminals.
- Disconnect the Battery Charger -VAS5906- from the power.

