Audi Q7: Headlamp, Removing and Installing
Headlamp Housing, Removing and Installing
Removing
- Turn on the ignition and disconnect the ground cable from the battery. Refer to → Chapter "Battery, Disconnecting and Connecting".
- Remove the front bumper cover. Refer to → Body Exterior; Rep. Gr.63; Front Bumper; Bumper Cover, Removing and Installing.
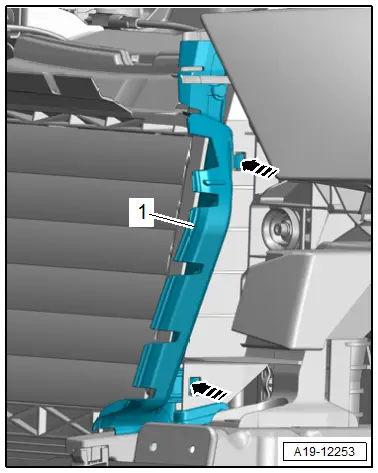
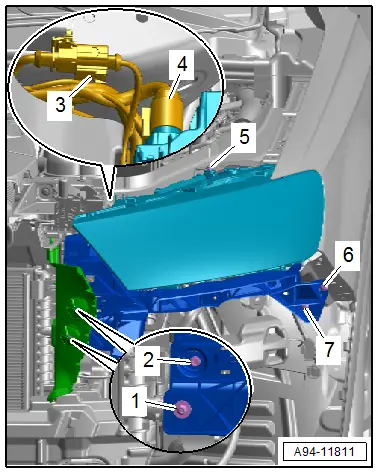
- If equipped: release the catches -arrows- and remove the air duct -1-.
- Loosen the bolts -5- four turns.
- Remove the bolts -1, 2, 6 and 7-.
- Disconnect the connector -4-.

 CAUTION
Extremely dangerous due to high-voltage.
With the headlamps switched on the HID headlamp components marked with the yellow high-voltage symbol are under high voltage. Electric shock is possible from contact with the components.
- With the illumination switched on never contact the components marked with the yellow high-voltage symbols.
- When performing procedures switch off the ignition and all electrical equipment, and place the ignition key outside of the vehicle.
- Do not operate the flashers.
- Disconnect the connector -4-.
 CAUTION
Pyrotechnical components can deploy unintentionally.
Risk of injury.
- Discharge the static electricity: quickly touch the door striker.
- Disconnect the connector -3-.
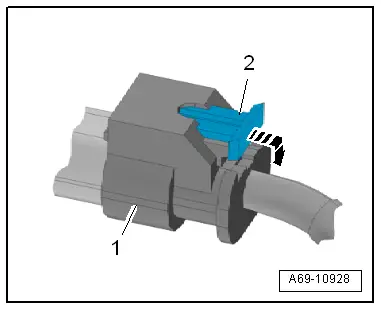
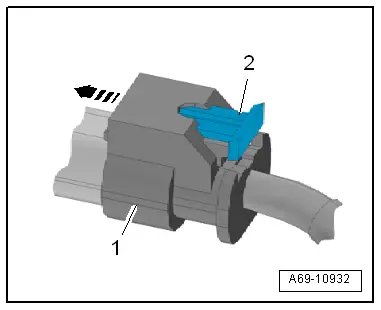
- Remove the connector lock -2-, press it down in direction of -arrow-, and disconnect the connector -1- on the crash sensor.
- Remove the headlamp housing slightly forward and remove the bleeder hose -2-.
- Remove the headlamp housing.
1 - Ignore
Installing
Install in the reverse order of removal while noting the following:
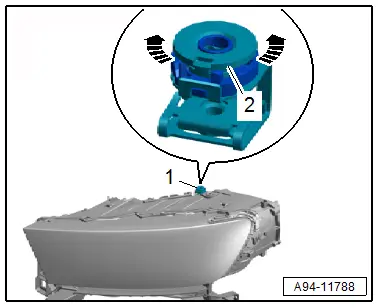
- Make sure the adjusting nut -2- on the adjusting mechanism -1- moves easily in direction of -arrows-.
- Turn the adjusting nut all the way down, but do not tighten it.
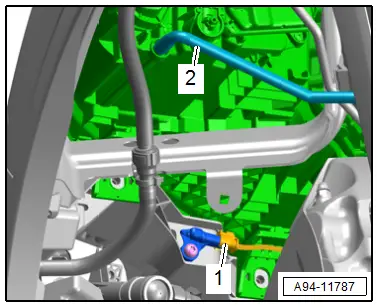
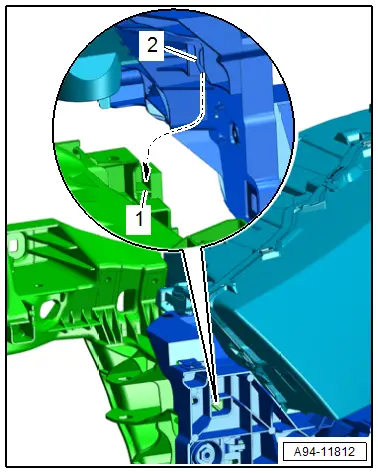
- Insert the headlamp housing, at the same time the securing tab -2- must engage in the mount -1- on the lock carrier in direction of -arrow-.
- Connect the connector -4-.
- Align the headlamp housing with the edge of the fender and tighten the bolt -2-.
- The headlamp housing must be flush with the fender.
- Tighten the bolts -1, 5, 6 and 7-.
TIP
Tightening the bolt -5- automatically turns the adjusting nut on the adjuster against the headlamp housing mounting point and secures the housing.
- Connect the connector -3-.
 CAUTION
Pyrotechnical components can deploy unintentionally.
Risk of injury.
- Discharge the static electricity: quickly touch the door striker.
- Attach the connector -1- until it clicks into place on the crash sensor -arrow-.
- Push in the connector lock -2-, the connector is secured by this.
- Push the bleeder hose on the connection.
- Connect the battery with the ignition switched on. Required actions.
- Adjust the headlamp. Refer to → Chapter "Headlamp, Adjusting".
Tightening Specifications
- Refer to → Chapter "Overview - Headlamps"
Headlamp Mount, Removing and Installing
Removing
- Remove the headlamp housing. Refer to → Chapter "Headlamp, Removing and Installing".
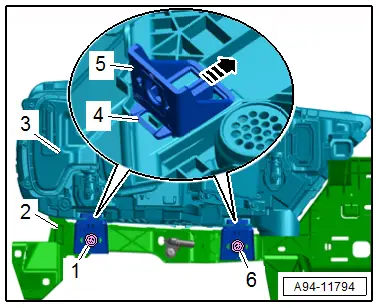
- Remove the bolts -1 and 6-.
- Remove the mount -2-.
- Release the catch -4- and remove the bracket -5- from the headlamp housing -3- in direction of -arrow-.
Installing
Install in reverse order of removal.
Tightening Specifications
- Refer to → Chapter "Overview - Headlamps"
Filter Membrane, Removing and Installing
Removing
- Remove the front wheel housing liner front section. Refer to → Body Exterior; Rep. Gr.66; Wheel Housing Liner; Front Wheel Housing Liner, Removing and Installing.
- Versions with side charge air cooler: remove the front bumper cover. Refer to → Body Exterior; Rep. Gr.63; Front Bumper; Bumper Cover, Removing and Installing.
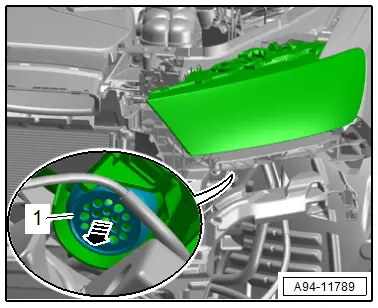
- Pry out the filter membrane -1- in direction of -arrow- and remove it.
Installing
Install in reverse order of removal.
Sealing Frame, Removing and installing
Removing
- Remove the headlamp housing. Refer to → Chapter "Headlamp, Removing and Installing".
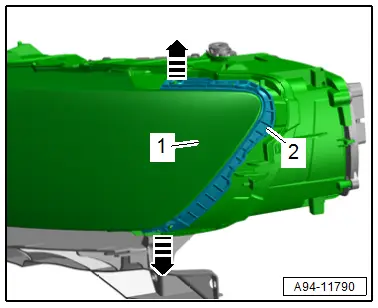
- Detach the frame -2- from the top and bottom of the headlamp housing -1--arrows- and remove it.
Installing
Install in reverse order of removal.

