Audi Q7: High-Mounted Brake Lamp
Overview - High-Mounted Brake Lamp
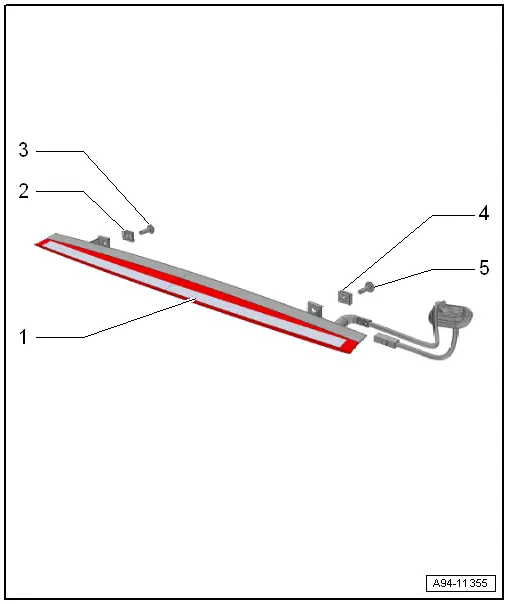
1 - High-Mounted Brake Lamp
- High-Mounted Brake Lamp Bulb -M25-
- Removing and installing. Refer to → Chapter "High-Mounted Brake Lamp Bulb, Removing and Installing".
2 - Spring Nut
3 - Bolt
- 2.5 Nm
4 - Spring Nut
5 - Bolt
- 2.5 Nm
High-Mounted Brake Lamp Bulb, Removing and Installing
Removing
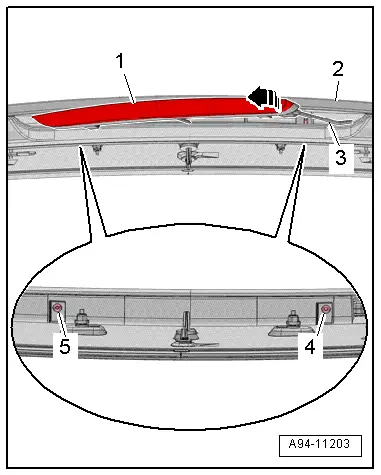
- Remove the roof spoiler. Refer to → Body Exterior; Rep. Gr.66; Spoiler; Spoiler, Removing and Installing.
- Remove the bolts -4 and 5-.
- Pivot the high-mounted brake lamp -1- on the right side out of the roof spoiler -2- in direction of -arrow- and guide out the wiring harness -3-.
Installing
Install in reverse order of removal.
Tightening Specifications
- Refer to → Chapter "Overview - High-Mounted Brake Lamp"
License Plate Lamp
Left and Right License Plate Lamp -X4-/-X5-, Removing and Installing
Removing
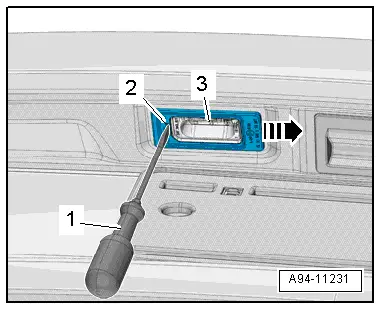
- Turn the light switch to position "0".
- Remove the license plate lamp -3- from the rear lid by positioning a screwdriver -1- at the slit -2- and sliding it in the direction of -arrow-.
Installing
Install in the reverse order of removal while noting the following:
- The entire license plate lamp must be replaced if an LED is faulty.
- Insert the license plate lamp into the opening and engage on the opposite side.

