Audi Q7: Lamps in Exterior Rearview Mirror
Audi Q7 (4M) 2016-2025 Workshop Manual / Electrical System / Electrical Equipment / Exterior Lights, Switches / Lamps in Exterior Rearview Mirror
Overview - Lamps in Exterior Rearview Mirror
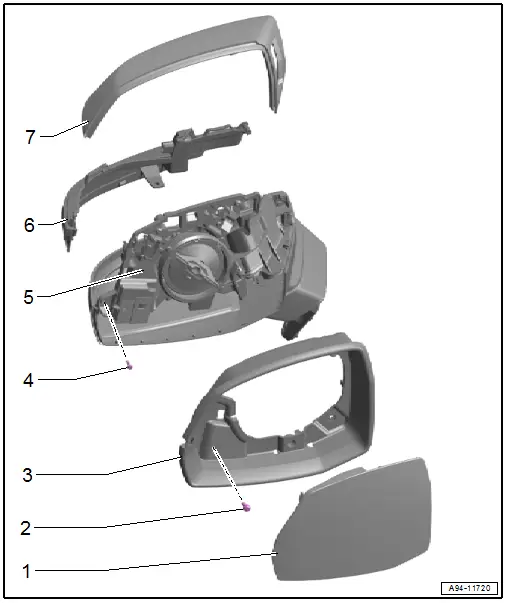
1 - Mirror Glass
2 - Bolt
- Quantity: 4
- Tightening Specification. Refer to → Body Exterior; Rep. Gr.66; Exterior Rearview Mirror; Overview - Exterior Rearview Mirror.
3 - Mirror Trim
4 - Bolt
- 0.9 Nm
- Quantity: 2
5 - Exterior Rearview Mirror
6 - Exterior Rearview Mirror Turn Signal
- With Driver Exterior Rearview Mirror Turn Signal Bulb -L131-
- With Front Passenger Exterior Rearview Mirror Turn Signal Bulb -L132-
- The entire exterior rearview mirror turn signal must be replaced if an LED is faulty.
- Removing and installing. Refer to → Chapter "Turn Signal, Removing and Installing".
7 - Mirror Cap
Turn Signal, Removing and Installing
Removing
- Remove the mirror cap. Refer to → Body Exterior; Rep. Gr.66; Exterior Rearview Mirror; Mirror Cap, Removing and Installing.
- Disconnect the connector -2- for the turn signal -1-.
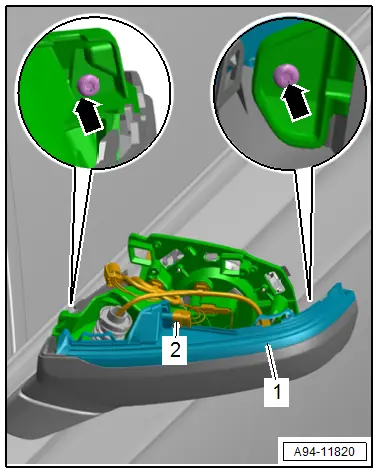
- Remove the bolts -arrows-.
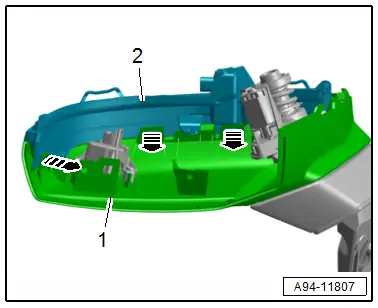
- Release the retainers -arrows- and remove the turn signal -2- from the exterior rearview mirror -1-.
Installing
Install in the reverse order of removal while noting the following:
- The entire exterior rearview mirror turn signal must be replaced if an LED is faulty.
Tightening Specifications
- Refer to → Chapter "Overview - Lamps in Exterior Rearview Mirror"

