Audi Q7: Night Vision System Camera, Removing and Installing
Special tools and workshop equipment required
- Torque Wrench 1783 - 2-10Nm -VAG1783-
 Caution
This procedure contains mandatory replaceable parts. Refer to component overview prior to starting procedure.
Mandatory Replacement Parts
- Seal - Night Vision System Camera
Removing
- Turn off the ignition and all electrical equipment and remove the ignition key.
- Remove the lock carrier cover. Refer to → Body Exterior; Rep. Gr.63; Front Bumper; Overview - Bumper Cover.
- Remove the mounting bracket with the release cable for the operating lever hook and move it to the side. Refer to → Body Exterior; Rep. Gr.55; Hood; Overview - Release Cable.
- Remove the upper air guide. Refer to → Rep. Gr.19; Radiator/Radiator Fan; Overview - Radiator/Radiator Fan.
- Release the clamp -arrow-, and remove the washer fluid hose -1-.
- If necessary seal the washer fluid hose.
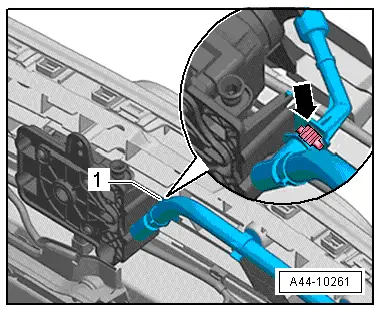
- Remove the bolts -arrows-.
- Remove the Night Vision System Camera -R212- with the retaining plate from the front bumper cover and guide upward. Pay attention that the spray nozzle is not damaged.
- Release and disconnect the connector to the Night Vision System Camera -R212-.
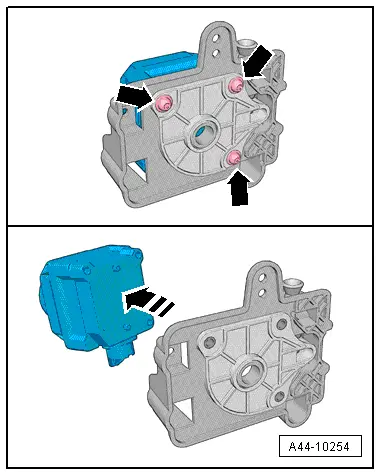
- Remove the bolts -arrows- and remove the Night Vision System Camera -R212- from the retaining plate.
Protective Window, Removing
- The Night Vision System Camera -R212- is removed
 Note
Note
If the protective window is no longer water tight due to damage, then the Night Vision System Camera -R212- must be completely replaced. Refer to → Chapter "Night Vision System Camera, Removing and Installing".
- Remove the trim -item 1-.
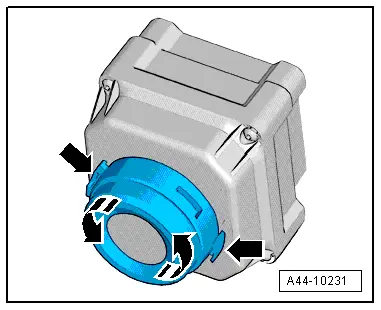
- Push the retaining tabs -arrows- together and turn the cover approximately 90º counter-clockwise.
- Remove the cover, protective window and seal from the Night Vision System Camera -R212-.
 Note
Note
Depending on the removal the seal may be replaced.
Installing
- Install in reverse order of removal. Note the following:
- Calibrate the night vision system camera. Refer to → Suspension, Wheels, Steering; Rep. Gr.44; Night Vision System; Night Vision System, Calibrating.
Tightening Specifications
- Refer to → Chapter "Overview - Night Vision System Camera -R212-"
Night Vision System Control Module, Removing and Installing
The Night Vision System Control Module -J853- is located in the front left footwell.
 Note
Note
If replacing the control module, select the "Replace control module" function for the corresponding control module. Refer to Vehicle Diagnostic Tester.
Removing
- Turn off the ignition and all electrical equipment and remove the ignition key.
- Loosen the front left seat and with the wires still attached and push rearward. Refer to → Body Interior; Rep. Gr.72; Front Seats; Overview - Front Seat.
- Remove the floor mat.
- Remove the sill panel. Refer to → Body Interior; Rep. Gr.70; Vehicle Interior Trim Panels; Overview - Sill Panel Strip.
- Remove the footrest. Refer to → Body Interior; Rep. Gr.70; Vehicle Interior Trim Panels; Overview - Footrest and Carpet.
- Disengage the carpet and push aside.
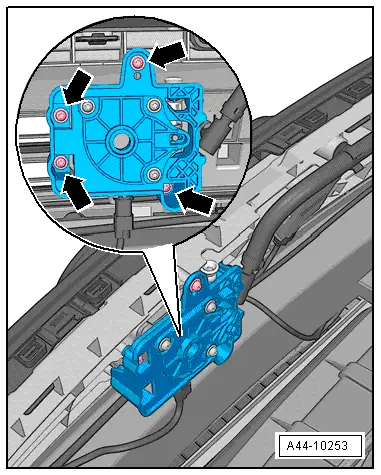
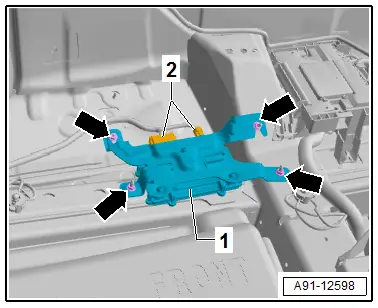
- Remove the nuts -arrows- from the bracket -1-.
- Release and disconnect the connectors -2- on the Night Vision System Control Module -J853-.
- Remove the Night Vision System Control Module -J853- with the bracket -1-.
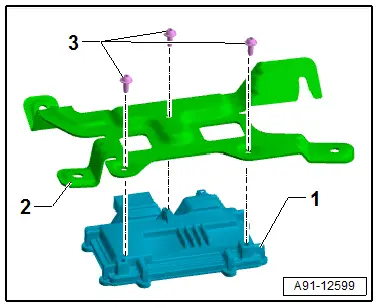
- Remove the bolts -3- and remove the Night Vision System Control Module -J853--1- with the bracket -2-.
Installing
Install in reverse order of removal.
Tightening Specifications
- Refer to → Chapter "Component Location Overview - Infrared System"
