Audi Q7: Overview - Front Thorax Airbag
Audi Q7 (4M) 2016-2025 Workshop Manual / Body / Body Interior / Passenger Protection, Airbags, Seat Belts / Overview - Front Thorax Airbag
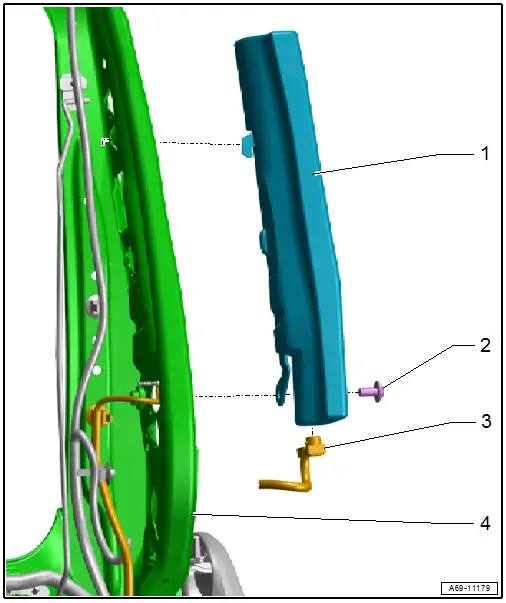
1 - Front Thorax Airbag
- Driver side: with the Driver Thorax Airbag Igniter -N199-
- Front passenger side: with Front Passenger Thorax Airbag Igniter -N200-
 WARNING
Follow all safety precautions when working on pyrotechnic components. Refer to → Chapter "Safety Precautions for Pyrotechnic Components".
- Removing and installing. Refer to → Chapter "Front Thorax Airbag with Igniter, Removing and Installing".
2 - Bolt
- 8 Nm
- Replace after removing
- Clean the threaded hole for the bolt with for example a thread tap.
- Install with locking compound. Refer to the Parts Catalog for the locking compound.
3 - Wire
- From Driver Thorax Airbag Igniter -N199-/Front Passenger Thorax Airbag Igniter -N200- directly to the connector station
- Removing and installing. Refer to → Chapter "Thorax Airbag Wire, Removing and Installing".
4 - Backrest Frame
Overview - Rear Thorax Airbag
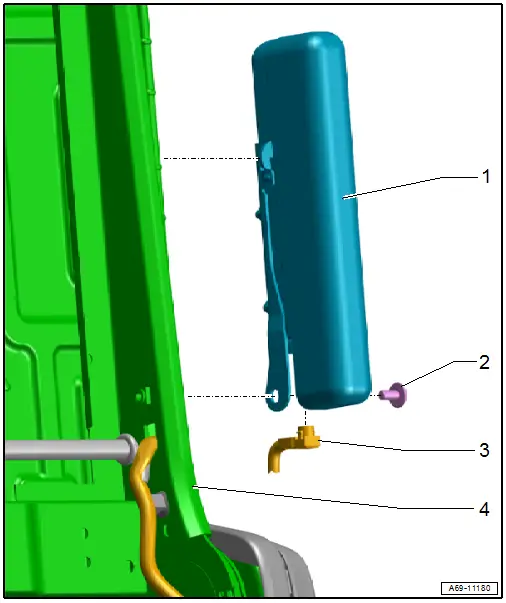
1 - Rear Thorax Airbag
- Driver side: with Driver Side Rear Thorax Airbag Igniter -N201-
- Passenger side: with Passenger Side Rear Thorax Airbag Igniter -N202-
 WARNING
Follow all safety precautions when working on pyrotechnic components. Refer to → Chapter "Safety Precautions for Pyrotechnic Components".
- Removing and installing. Refer to → Chapter "Rear Thorax Airbag with Igniter, Removing and Installing".
2 - Bolt
- 8 Nm
- Replace after removing
- Clean the threaded hole for the bolt with for example a thread tap.
- Install with locking compound. Refer to the Parts Catalog for the locking compound.
3 - Wire
- From Driver Side Rear Thorax Airbag Igniter -N201-/Passenger Side Rear Thorax Airbag Igniter -N202- going through to the connector station.
- Removing and installing. Refer to → Chapter "Thorax Airbag Wire, Removing and Installing".
4 - Backrest Frame

