Audi Q7: Selector Lever Handle, Removing and Installing
 Note
Note
Both the selector lever handle and the selector lever boot are removed.
Special tools and workshop equipment required
- Trim Removal Wedge -3409-
- Torque Wrench 1410 -VAG1410-
Removing
- Ignition switched off.
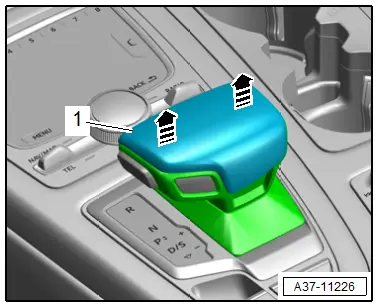
- Remove the selector lever handle upper section -1- upward in direction of -arrows-.
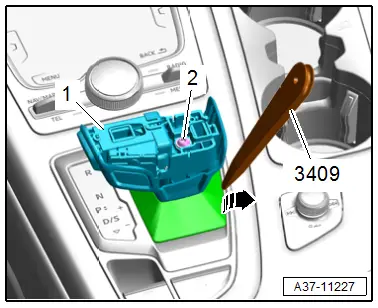
- Carefully pry out the selector lever boot on the side using the Trim Removal Wedge -3409- in direction of -arrow-.
- Remove the bolt -2-.
- Pull the selector lever handle lower section -1- upward.
Installing
Install in the reverse order of removal while noting the following:
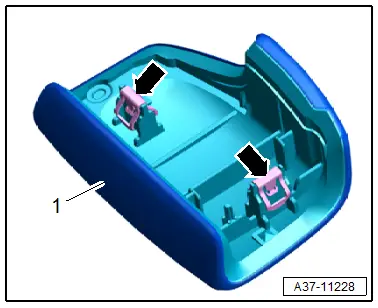
- Check the clips -arrows- on the bottom of the selector lever handle upper section -1- are seated correctly, and if necessary press them in farther.
- Attach the selector lever handle upper section to the selector lever handle lower section.
- Clip in the selector lever boot on the Selector Lever Transmission Range Display -Y5-.
- Check the selector mechanism. Refer to → Chapter "Selector Mechanism, Checking".
Tightening Specifications
- Refer to → Chapter "Overview - Selector Mechanism"
Selector Lever Boot on Selector Lever Handle, Disconnecting and Assembling
Separating
- Remove the selector lever handle. Refer to → Chapter "Selector Lever Handle, Removing and Installing".
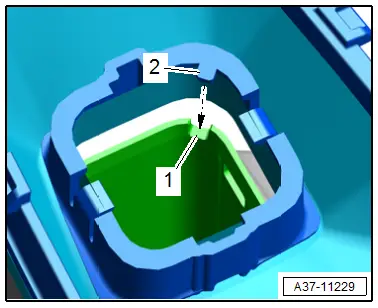
- Release the catches in direction of -arrows- and remove the selector lever boot -1- from the selector lever handle.
Assembling
- Push the selector lever boot on the selector lever handle until it clicks into place.
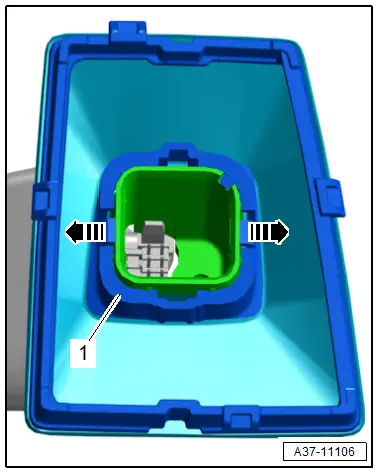
- The tab -2- on the selector lever boot must engage in the opening -1- in the selector lever handle -arrow-.
- Install the selector lever handle. Refer to → Chapter "Selector Lever Handle, Removing and Installing".
Selector Mechanism, Removing and Installing
Special tools and workshop equipment required
- Torque Wrench 1410 -VAG1410-
Removing
- Remove the selector lever handle. Refer to → Chapter "Selector Lever Handle, Removing and Installing".
- Remove the center console insert. Refer to → Body Interior; Rep. Gr.68; Center Console; Center Console, Removing and Installing.
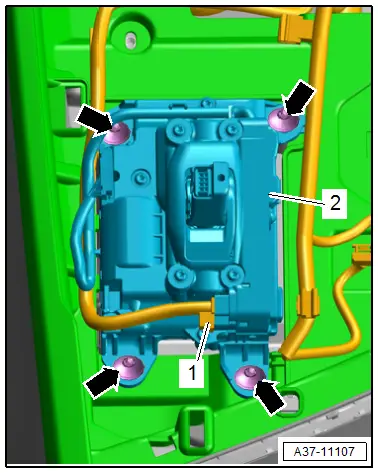
- Disconnect the connector -1-.
- Remove the bolts -arrows- and remove the selector mechanism -2-.
Installing
Install in the reverse order of removal while noting the following:
- Install the center console insert. Refer to → Body Interior; Rep. Gr.68; Center Console; Center Console, Removing and Installing.
- Install the selector lever handle. Refer to → Chapter "Selector Lever Handle, Removing and Installing".
- Check the selector mechanism. Refer to → Chapter "Selector Mechanism, Checking".
Tightening Specifications
- Refer to → Chapter "Overview - Selector Mechanism"

