Audi Q7: Drive Axle, Removing and Installing
Special tools and workshop equipment required
- Torque Wrench 1332 40-200Nm -VAG1332-
Removing
- Loosen the connection between the drive axle and wheel hub. Refer to → Chapter "Drive Axle Threaded Connection, Loosening and Tightening".
- Remove the front wheel. Refer to → Chapter "Wheels and Tires".
- Remove the shield or subframe shield upper section. Refer to → Chapter "Subframe Shield, Removing and Installing".
Q7 e-tron
 Caution
There is a risk of damaging the wheel bearing housing.
The slits in the wheel bearing housing must not be widened using a chisel or similar tool!
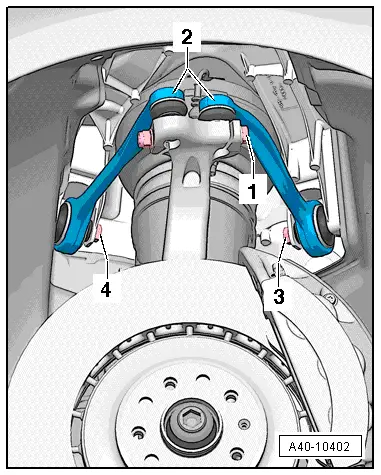
- Disconnect the threaded connection -1-.
- Remove the joint pins in the upper control arm -2- from the wheel bearing housing.
 Note
Note
Ignore items -3 and 4-.
Continuation for All Vehicles
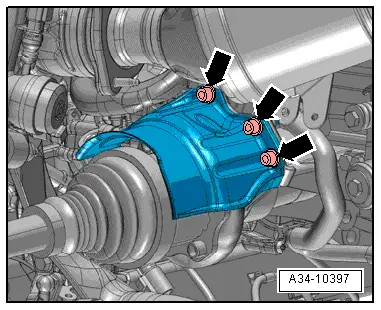
- Remove the drive axle heat shield. Refer to → Chapter "Drive Axle Heat Shield, Removing and Installing".
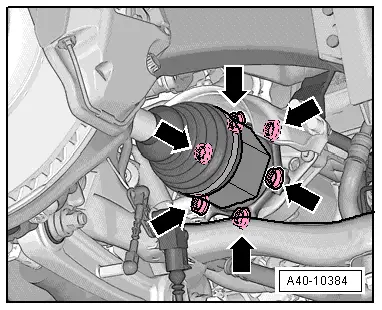
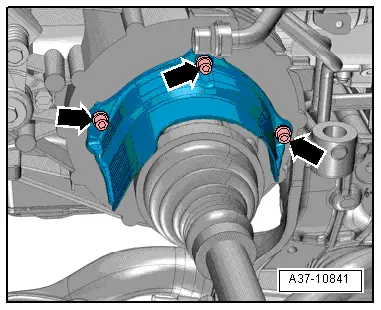
- Remove the bolts -arrows- that connect the drive axle and flange shaft.
- Remove the drive axle at the same time do not damage the CV boot and the coating from the drive axle.
Installing
Install in reverse order of removal and note the following:
- Tighten the drive axle to wheel hub threaded connection. Refer to → Chapter "Drive Axle Threaded Connection, Loosening and Tightening".
Tightening Specifications
- Refer to → Chapter "Overview - Drive Axle"
- Refer to → Chapter "Wheels and Tires"
Drive Axle Heat Shield, Removing and Installing
Left Drive Axle Heat Shield

Right Drive Axle Heat Shield

Drive Axle Threaded Connection, Loosening and Tightening
Special tools and workshop equipment required
- Torque Wrench 80-400Nm -VAG1576-
- 19 mm inner hex socket, commercially available
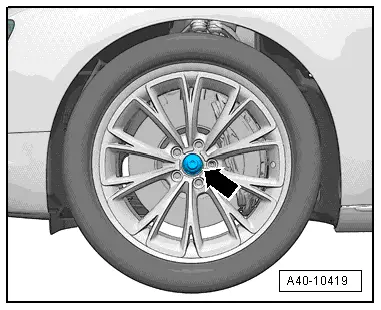
Loosen the threaded connection between the drive axle and wheel hub
- With vehicle still resting on its wheels, loosen the bolt -arrow- a maximum of 90º using the 19 mm inner hex socket, otherwise the wheel bearing will be damaged.
- Lift the vehicle just enough so that the wheels are hanging free.
- Apply the brakes (a second technician required).
- Remove the bolt.
Tighten the threaded connection between the drive axle and wheel hub
 Note
Note
- Replace bolt after removal.
- Before installing, clean the threads in the CV joint/stub axle with a thread tap.
- Wheels must not yet touch the ground when tightening the drive axle/stub shaft or the wheel bearing can be damaged.
- Apply the brakes (a second technician required).
- Tighten the bolt to 200 Nm.
- Lower the vehicle onto its wheels.
- Tighten bolt an additional 180º.