Audi Q7: Fender Bracket, Removing and Installing, Center
Removing
- Remove the rear cover for the fender. Refer to → Chapter "Rear Fender Cover, Removing and Installing".
- Remove the windshield washer fluid reservoir. Refer to → Electrical Equipment; Rep. Gr.92; Windshield Washer System; Washer Fluid Reservoir, Removing and Installing.
- Remove the bolts -1, 3 and 4-.
- Remove the center bracket -2-.

Installing
Install in reverse order of removal.
Tightening Specifications
- Refer to → Chapter "Overview - Fender"
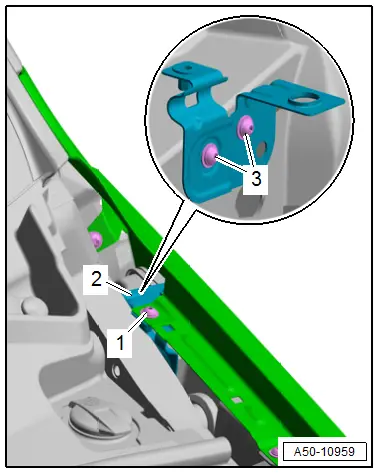
Fender Bracket, Removing and Installing, Rear
Removing
- Remove the rear cover for the fender. Refer to → Chapter "Rear Fender Cover, Removing and Installing".
- Remove the windshield washer fluid reservoir. Refer to → Electrical Equipment; Rep. Gr.92; Windshield Washer System; Washer Fluid Reservoir, Removing and Installing.
- Remove the bolts -1 and 3-.
- Remove the rear bracket -2-.
Installing
Install in reverse order of removal.
Tightening Specifications
- Refer to → Chapter "Overview - Fender"
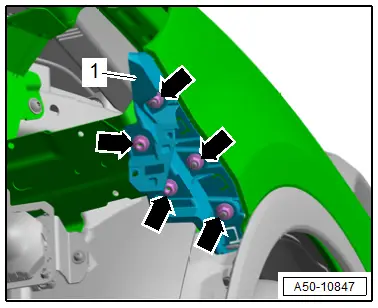
Bumper Cover Mount, Removing and Installing
Removing
- Remove the headlamps. Refer to → Electrical Equipment; Rep. Gr.94; Headlamps; Headlamps, Removing and Installing.
- Remove the nuts -arrows-.
- Remove the mount -1-.
Installing
Install in reverse order of removal.
Tightening Specifications
- Refer to → Chapter "Overview - Bumper Cover"
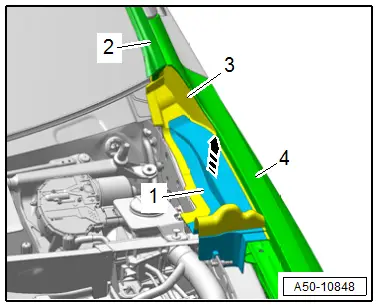
Rear Fender Cover, Removing and Installing
Removing
- Remove the headlamp cover. Refer to → Chapter "Headlamp Cover, Removing and Installing".
- Remove the rear cover -1- upward -arrow- at the same time guide out the sealing lip -3- on the fender -4- and the drip rail -2-.
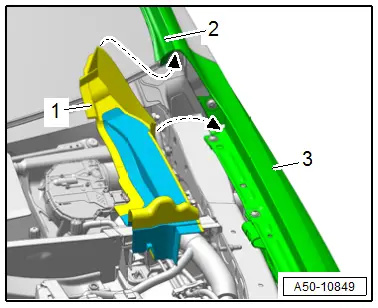
Installing
Install in reverse order of removal and note the following:
- The sealing lip -1- must be seated correctly in the opening on the fender -3- and under the drip rail -2--arrows-.
End Panel, Removing and Installing
Removing
- Remove the front door. Refer to → Chapter "Door, Removing and Installing".
- Remove the expanding rivets -arrows-.
- Remove the end panel -1- to the rear.

Installing
Install in reverse order of removal.

